RUN ANDROID ON PC USING VIRTUALBOX
STEPS
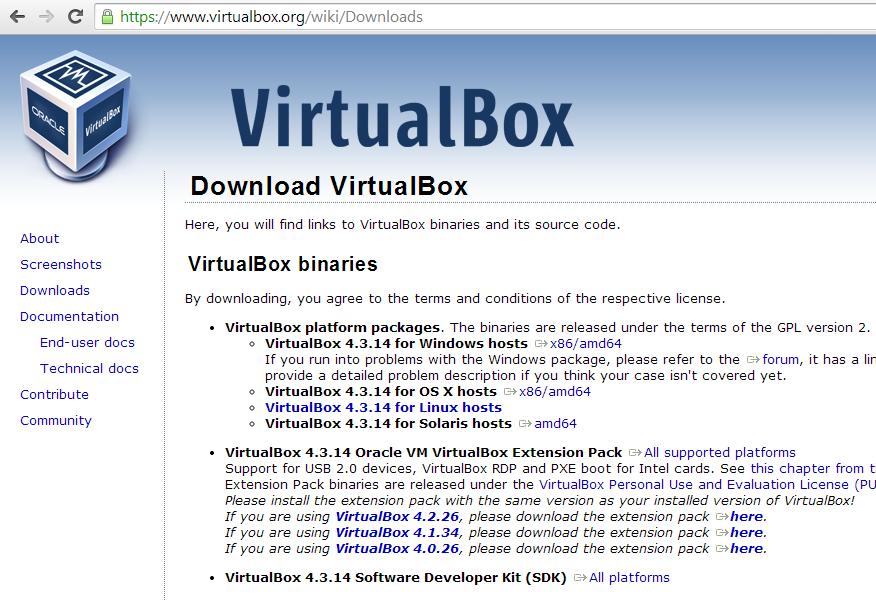
1) Download and install VirtualBox
This tutorial assumes that you know how to install and use VirtualBox software.
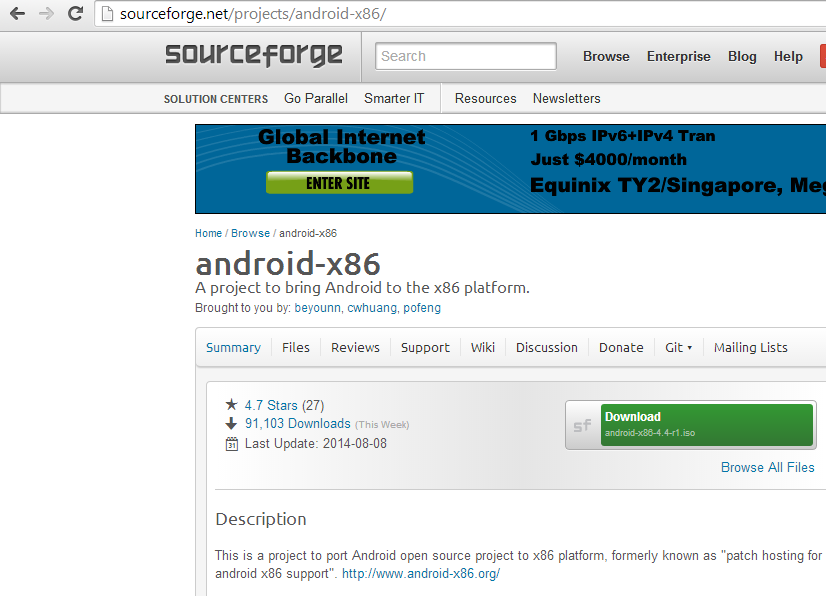
2) Download Android ISO file.
This tutorial uses the file android-x86-4.4-r1.iso .
3) Prepare A New VirtualBox Machine For Android Installation.
3-1) Click New Button.
3-2) Enter the following Virtual Machine details.
Name: Android44 (It can be any name)
Type: Linux
Version: Other Linux (32 bit)
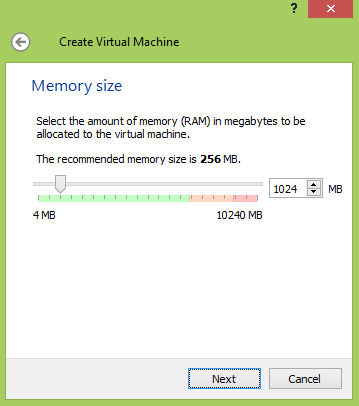
3-3) Set Memory Size.
Android 4.4 requires 1024 MB size.
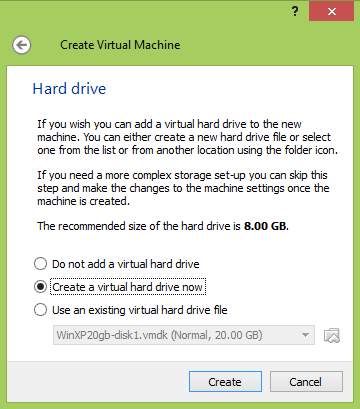
3-4) Hard Drive option.
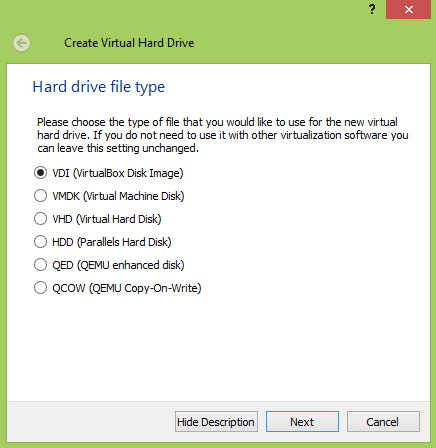
3-5) Set Hard Drive file type.
Select VDI.
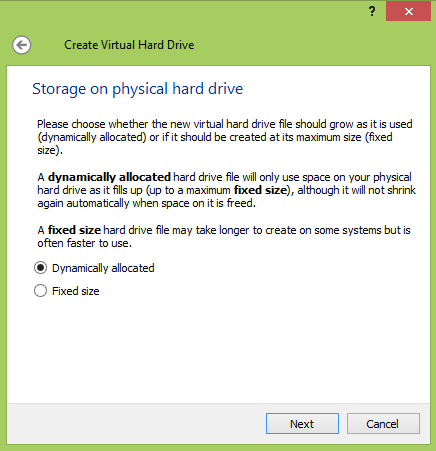
3-6) Storage option.
Select Dynamically allocated.
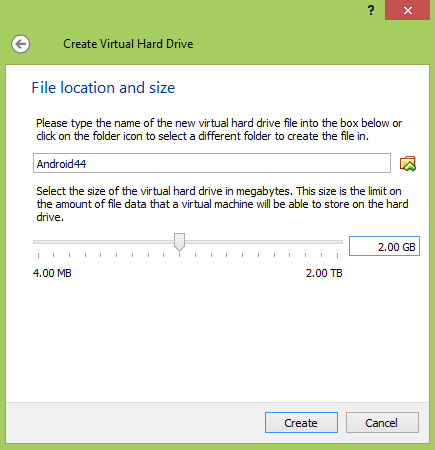
3-7) File Location and Size.
Select 2.00 GB (you can set other values as long as you have enough storage available)
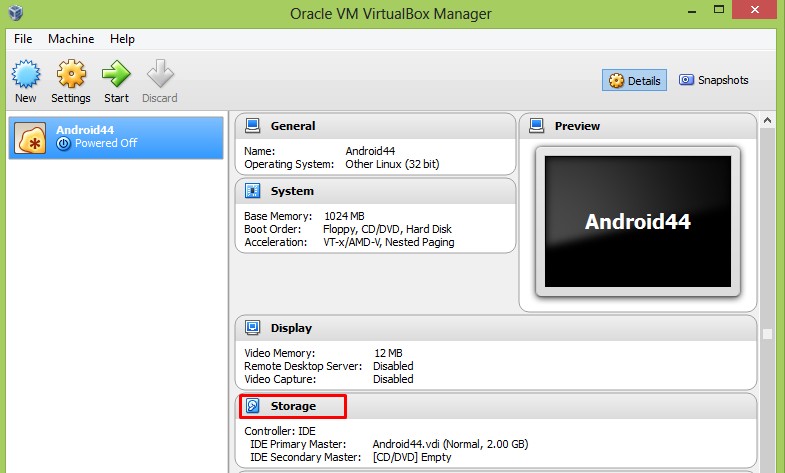
3-8) Android Virtual Machine has been successfully created.
Notice the Storage option button. We will click this button in the next step,
4) Add Bootable Installation CD
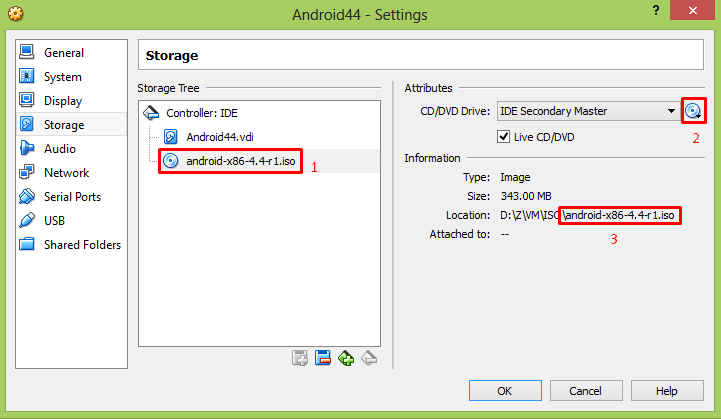
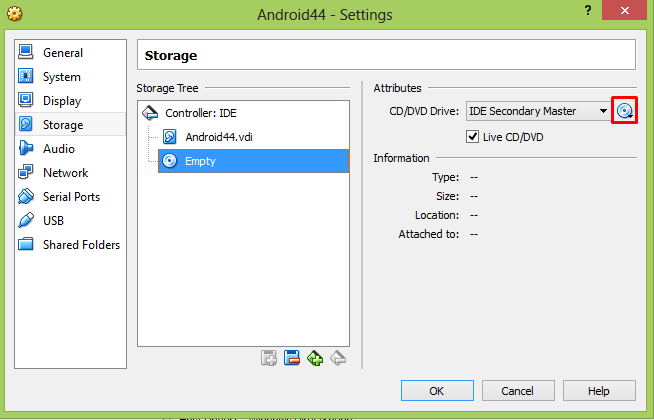
4-1) Click Storage option button.
Refer image in step 3-8.
4-1-1) Click the CD item in the Storage Tree section.
4-1-2) Click the CD icon in Attributes section. Browse for the location of your Android ISO file.
4-1-3) Check that your Android ISO file name is shown in the location field.
5) Boot The Android Virtual Machine.
5-1) Click Start button.
5-2) Select Installation option.
Select “Installation – Install Android-x86 to harddisk”.
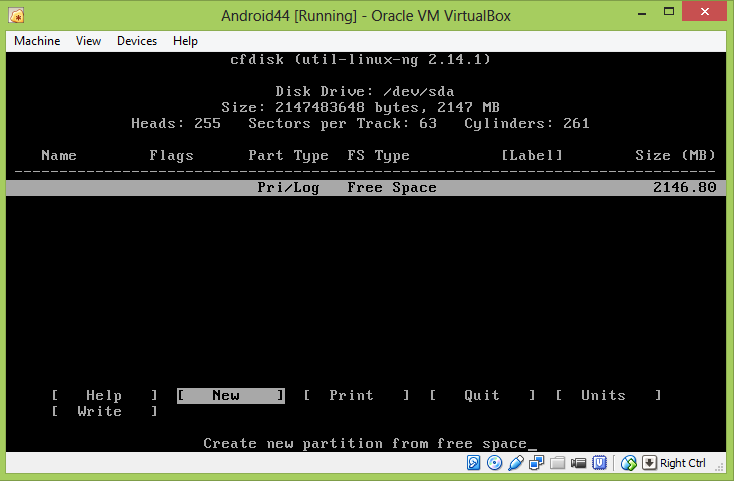
5-3) Create Partition.
Select Create/Modify partitions.
5-4) Use right-arrow key to move your cursor and choose New and then press ENTER key.
5-5) Select Primary and press ENTER key.
5-6) Press ENTER key to accept default partition size.
5-7) New Partition (sda1) is created.
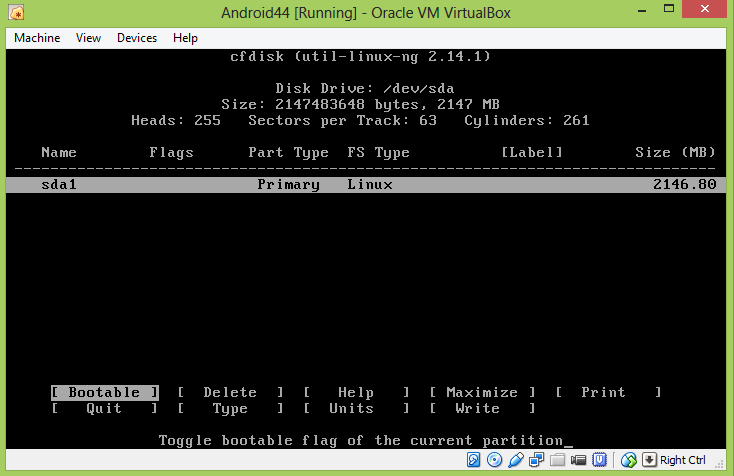
5-8) Select Bootable and press ENTER key.
5-9) The word Boot appears in the Flags column.
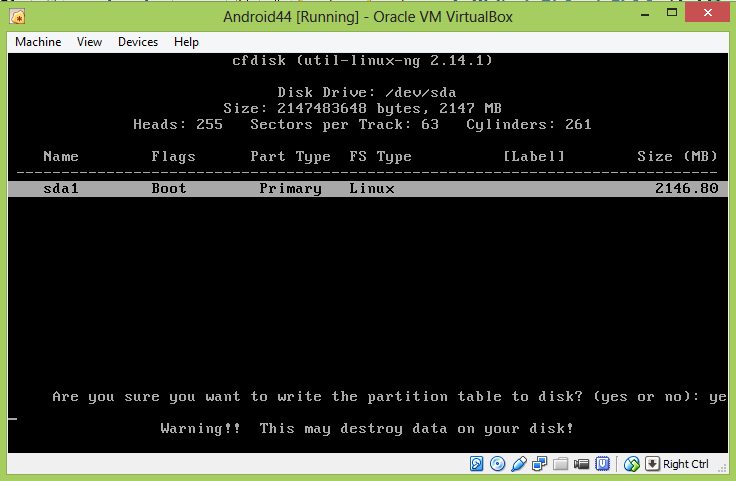
5-10) Select Write and Press ENTER key.
5-11) Type “yes” to confirm Write action.
5-12) Wait for writing process to complete.
5-13) Select Quit and press ENTER Key.
6) Install Android
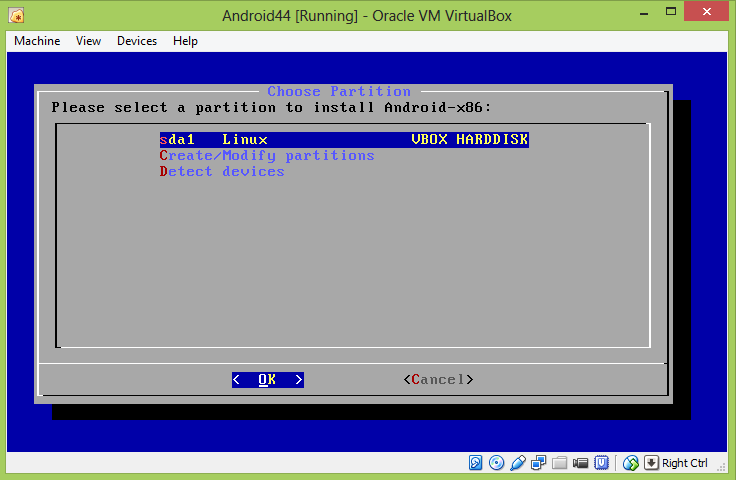
6-1) Select OK to start installation on sda1 partition.
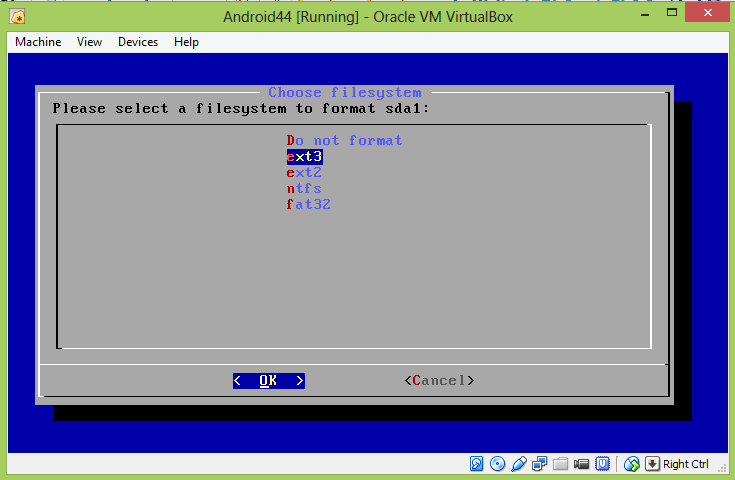
6-2) Select ext3 format and proceed.
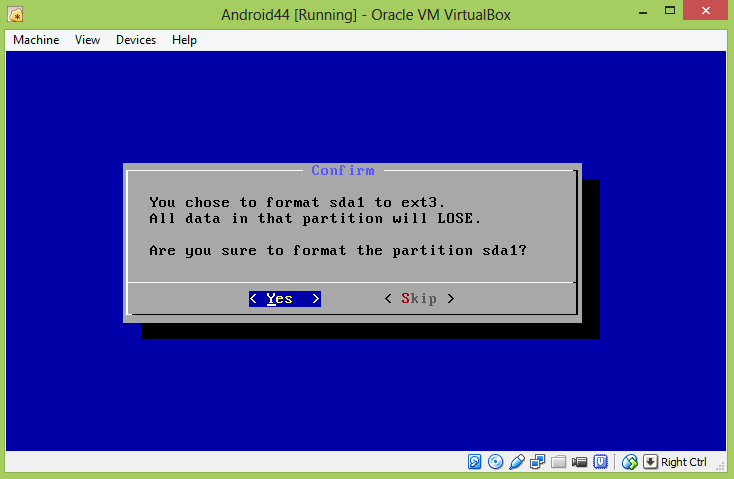
6-3) Select Yes to format the partition sda1.
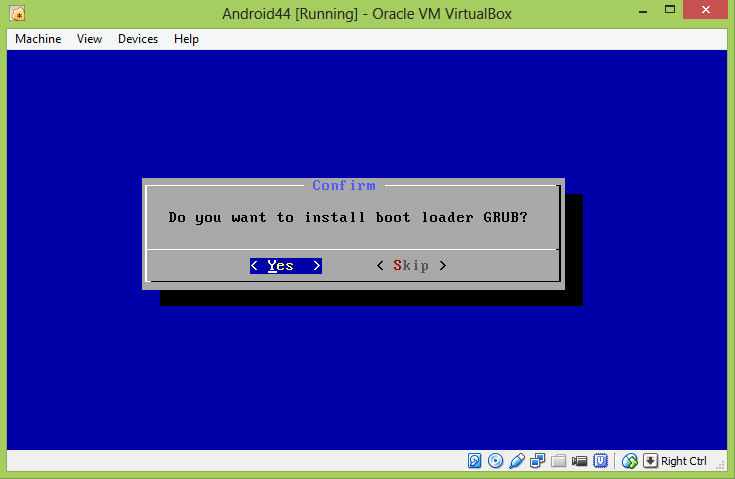
6-4) Select Yes to install GRUB Loader.
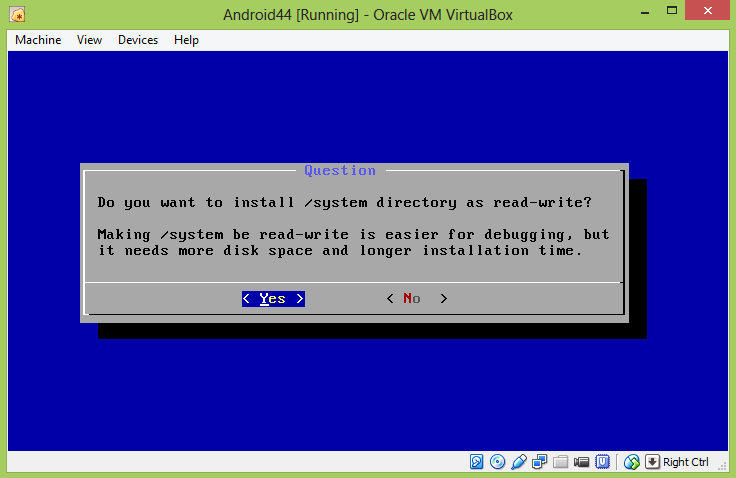
6-5) Select Yes to allow Read/Write storage options.
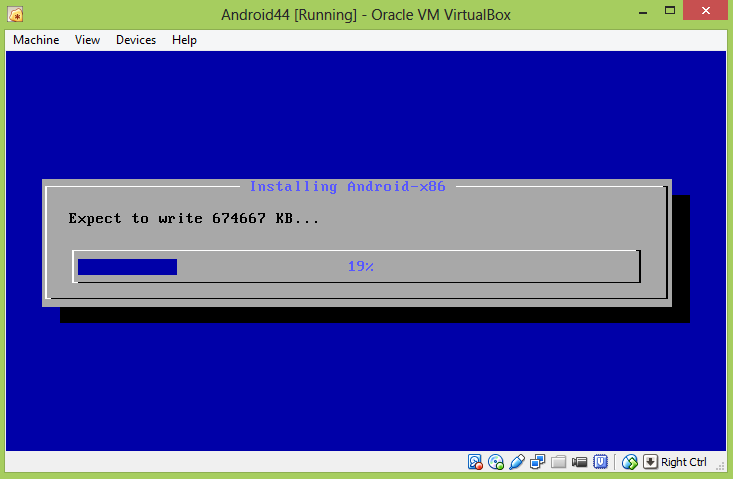
6-6) Wait for installation process to complete.
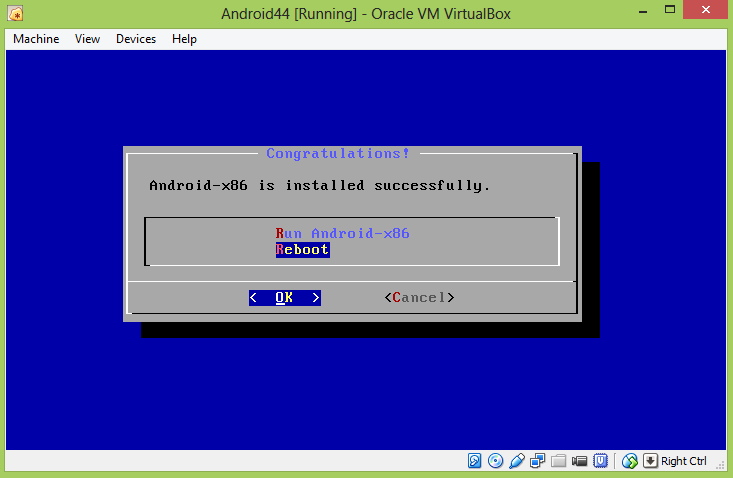
6-7) Select Reboot.
6-8) Don’t forget to remove installation CD from the Virtual Machine.
7) Run Android
7-1) Click Start Button to run Android.
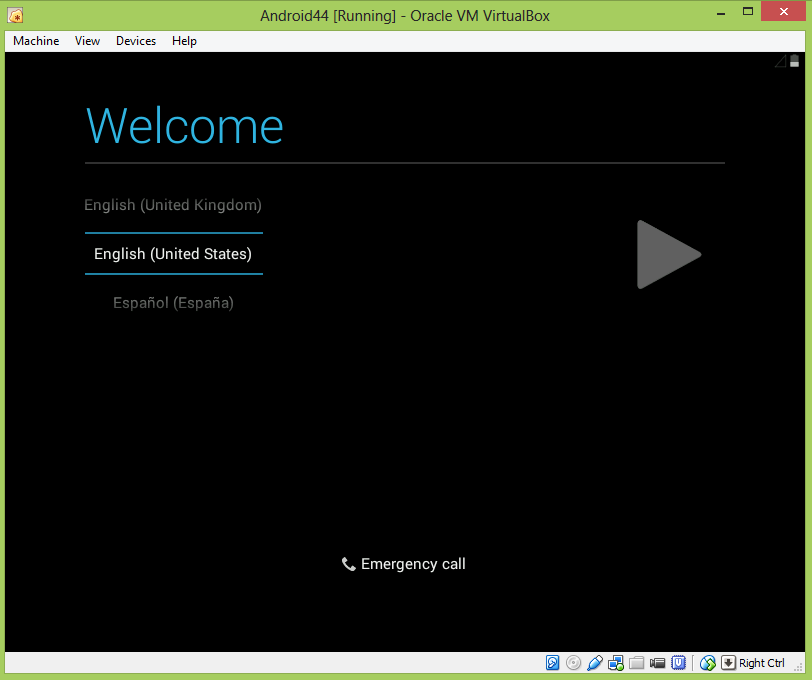
7-2) Select Language.
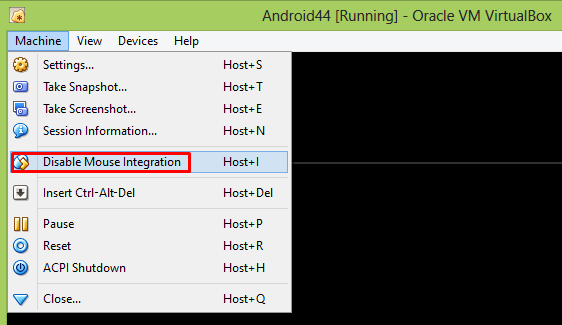
Info: If you cannot see your mouse within the Android window, disable mouse integration option.
|
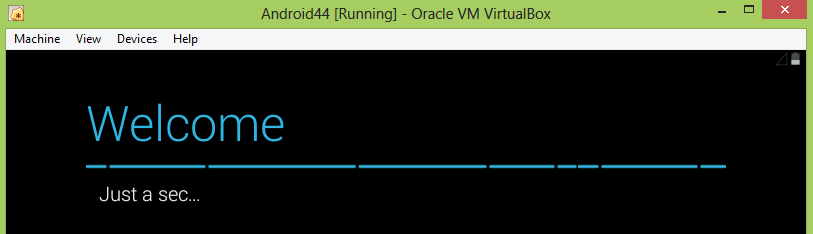
7-3) Wait…
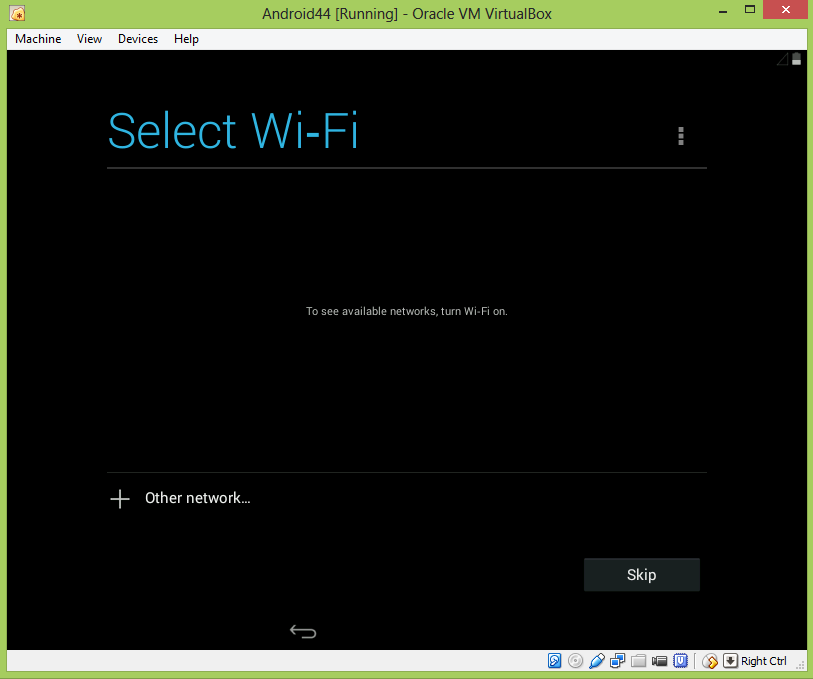
7-4) Select SKIP.
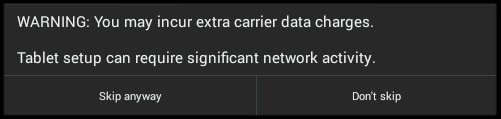
7-5) Select “Skip Anyway”.
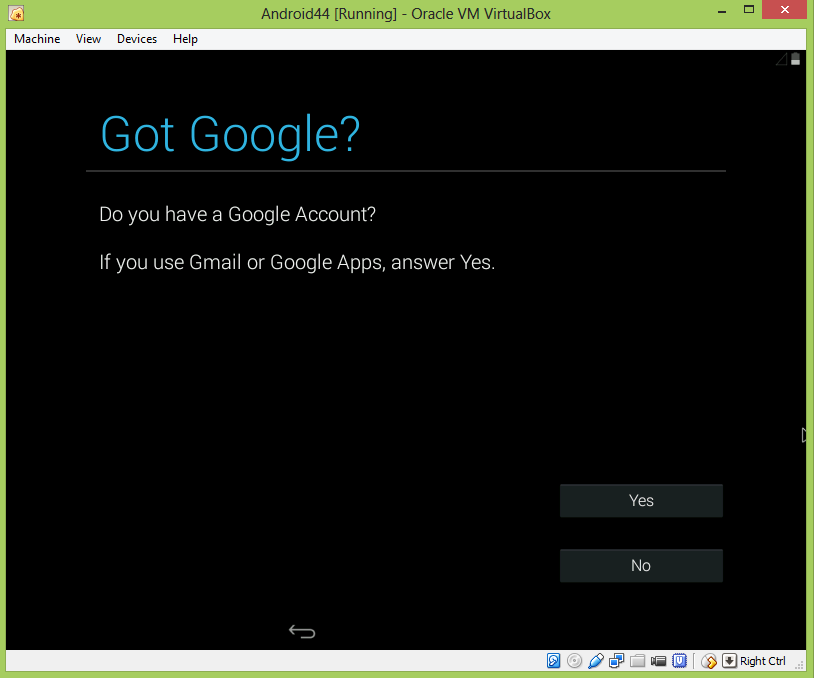
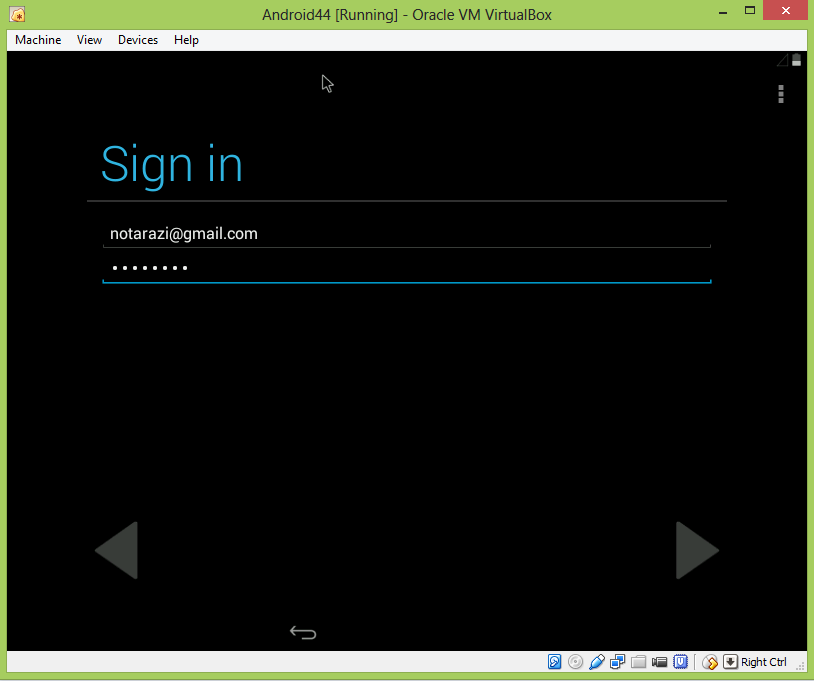
7-6) If you already have a Google Account, select Yes.
7-7) Use your Google login credential to proceed.
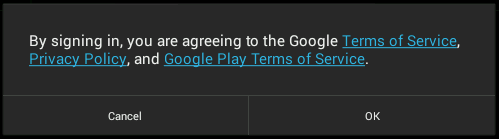
7-8) Agree to the terms.
7-9) Wait for signing in process.
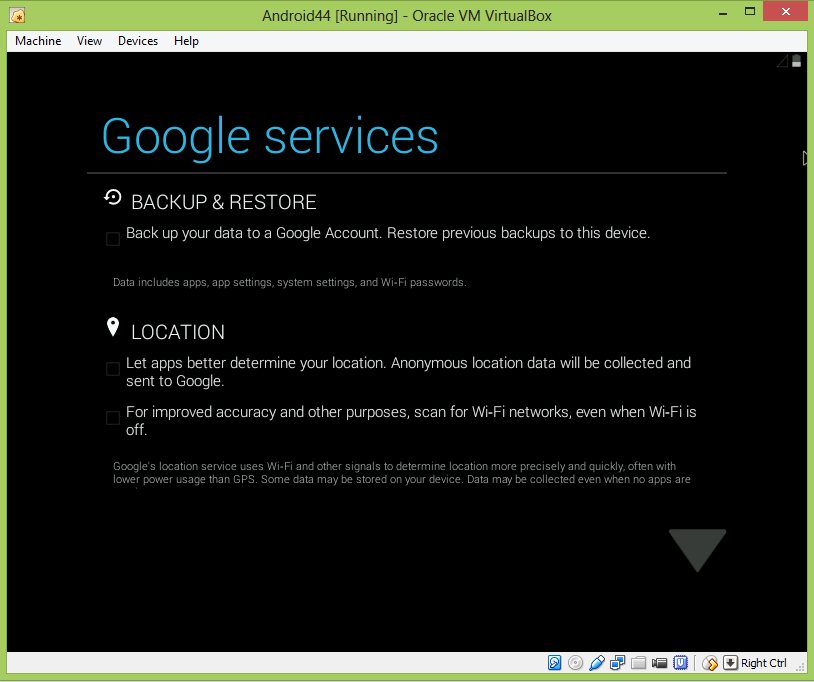
7-10) Set your preferences…
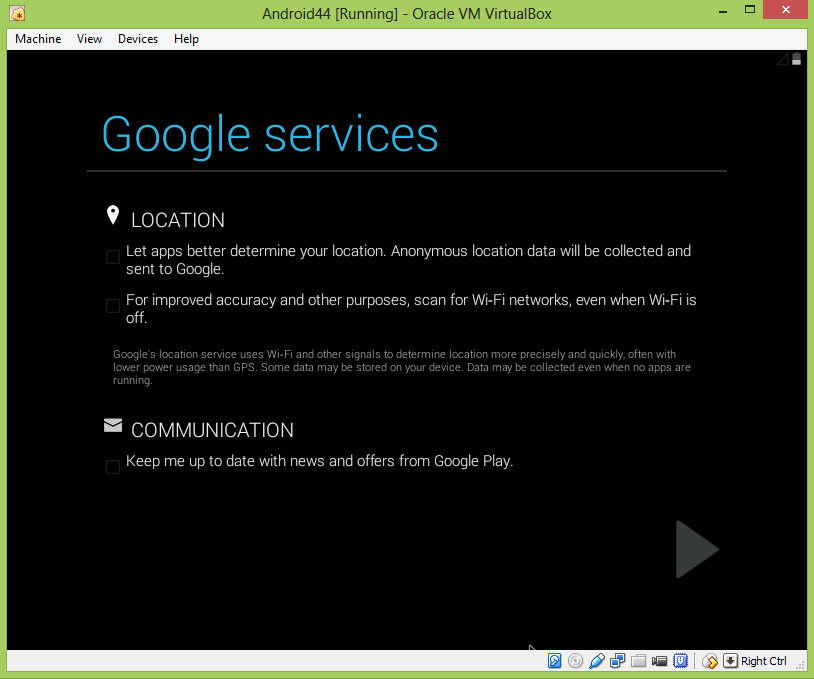
7-11) Set your preferences (continued)
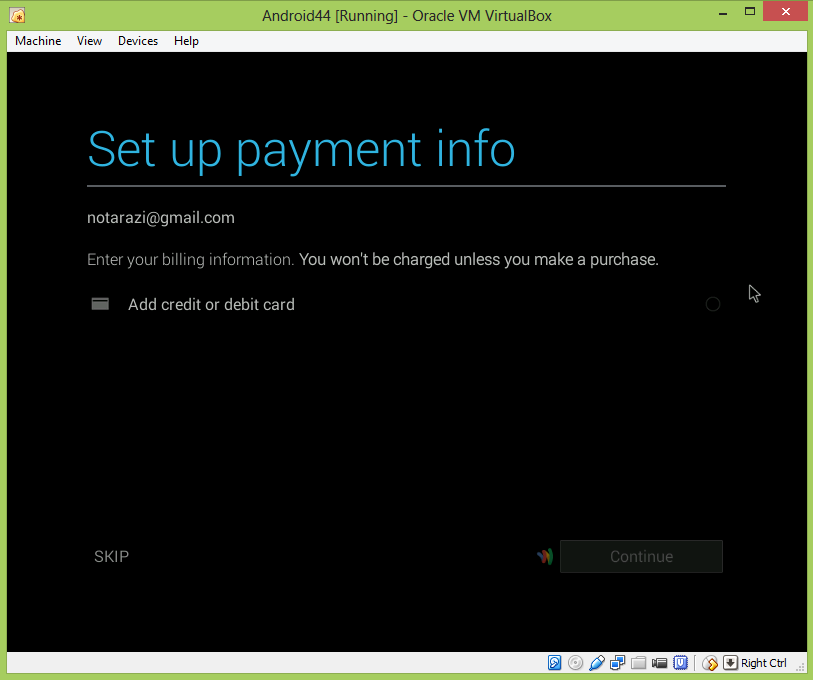
7-12) Skip Payment Setup.
7-13) Set Date and Time.
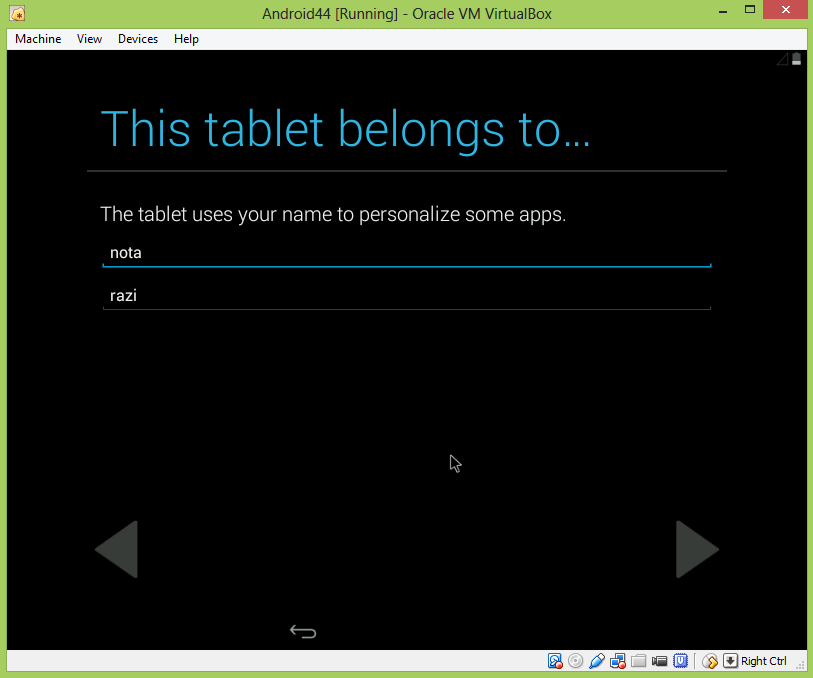
7-14) Personalization option.
7-15) It’s done.