Learn the powerful enterprise adaptable database:

Getting Started With ADABAS & Natural

Thursday, January 31, 2013

GUI Editor Redmond Path


Redmond Path provides a GUI editor for Windows user to edit the Path and Environment variable.

1) Download from https://sites.google.com/site/notawindows/home/download/RedmondPath.zip?attredirects=0&d=1

2) Unzip and run.


3) If you want to add a new entry, click + button. Browse for the target path. Click Ok.


Path and Environment variables in Windows


Question

How to set the path and environment variables in Windows.

Answer

Windows Vista and Windows 7 users
Windows 2000 and Windows XP users

Windows Vista and Windows 7 users
  1. From the Desktop, right-click My Computer and click Properties.
  2. Click Advanced System Settings link in the left column.
  3. In the System Properties window click the Environment Variables button.
Windows enviromental path settings


Windows 2000 and Windows XP users
The path is now managed by Windows 2000 and Windows XP and not the autoexec.bat or autoexec.nt files as was done with earlier versions of Windows. To change the system environment variables, follow the below steps.
  1. From the Desktop, right-click My Computer and click Properties.
  2. In the System Properties window, click on the Advanced tab.
  3. In the Advanced section, click the Environment Variables button.
  4. Finally, in the Environment Variables window (as shown below), highlight the Path variable in the Systems Variable section and click the Edit button. Add or modify the path lines with the paths you wish the computer to access. Each different directory is separated with a semicolon as shown below.

    C:\Program Files;C:\Winnt;C:\Winnt\System32
Windows enviromental path settings


Alternatively, you can use Redmond Path Editor.


Laravel Database Configuration


1) Open {laravel home}/application/config/database.php

2) Edit the connection setting.


3) Access MySql database via phpmyadmin. Create new database myfirstdb.


4) Click Check Privileges. Click Add user.


5) Enter new user details.
Username: myfirstuser
Host: localhost
Password: myfirstpassword
Global Privileges -> Check All.

Click Add user.


6) You can use a php script file to test your connection setting. (e.g https://sites.google.com/site/notalaravel/home/download/dbtest.php?attredirects=0&d=1)

7) Put the dbtest.php at the public folder and access it via web browser.


8) Check that the connection is successful.


Saturday, January 26, 2013

Laravel myfirst.dev Virtual Host On XAMPP

NOTE:
This post was initially written in February 2013. It contained some errors, i.e, the name mysite.dev was written as mysite.local at some places. (refer comment threads below)
I have corrected this post in July 2013.
I have also written a simpler approach to do this on another post, http://setup-steps.blogspot.com/2013/07/laravel-3-development-environment.html

Happy Coding!
-----


1) Download Laravel package from http://laravel.com/download https://github.com/laravel/laravel/tree/3.0

2) Extract the Laravel package content to XAMPP htdocs folder. Rename the package folder as myfirst.dev.


3) Run XAMPP Control Panel. Start Apache and MySQL.

4) Test the url:
4a) http://localhost (the index.php file at this path will redirect to http://localhost/xampp)

4b) Type http://localhost/myfirst.dev/public (the Laravel public folder shall appear)


5) Add new domain name to Windows host file.
5a) Run Notepad as Administrator.
5b) Open c:\windows\system32\drivers\etc\hosts
5c) Edit/Add Entry to look like below (be careful to add a space in between the texts)
127.0.0.1 localhost myfirst.dev
5d) Save


6) Move myfirst.dev folder to a new location.
a) Cut the folder [XAMPP_HOME]/htdocs/myfirst.dev
b) Paste it to [XAMPP_HOME]/sites/myfirst.dev


7) We will add a Virtual Host setting so that we can point the URL http://myfirst.dev to the new location in Step 6.
7a) open [XAMPP_Home]\apache\conf\extra\httpd-vhosts
7b) look for the followings:
#
# Use name-based virtual hosting.
#
# NameVirtualHost *:80

7c) Change to the followings (the last line is not commented):
#
# Use name-based virtual hosting.
#
NameVirtualHost *:80

7d) At the end of the file, add the followings:
NameVirtualHost *
  <VirtualHost *>
    DocumentRoot "C:/Z/Dev/xampp/htdocs"
    ServerName localhost
  </VirtualHost>
  <VirtualHost *>
    DocumentRoot "C:/Z/Dev/xampp/sites/myfirst.dev/public"
    ServerName mylaravel.local myfirst.dev
</VirtualHost>


8) Restart Apache. You may get XAMPP new security concept. The httpd-xampp.conf has been configured to be very restrictive in terms of path/folder access.


9) You can turn-off the restriction.

9a) Open [XAMP_Home]/apache/conf/httpd-xampp.conf

9b) Look for the followings:

#
# Each directory to which Apache has access can be configured with respect
# to which services and features are allowed and/or disabled in that
# directory (and its subdirectories). 
#
# First, we configure the "default" to be a very restrictive set of 
# features.  
#
<Directory />
   AllowOverride none
   Require all denied
</Directory>


9c) Change the highlighted codes above into:

#
# Each directory to which Apache has access can be configured with respect
# to which services and features are allowed and/or disabled in that
# directory (and its subdirectories). 
#
# First, we configure the "default" to be a very restrictive set of 
# features.  
#
<Directory />

# "default" restriction is turned off
        AllowOverride All
        Order Allow,Deny
        Allow from all

</Directory>


10) Restart Apache. Go to http://myfirst.dev/
Notice the URL path and Physical path.


XAMPP For Windows


1) Download XAMPP for Windows, http://www.apachefriends.org/en/xampp-windows.html.


2) Unzip to Windows Root, i.e C:\


3) Right-Hand Click xampp-control, Select Run as Administrator.


NOTE:
=====

1) If XAMPP is not installed at the root, you must run the setup_xampp.bat file in order for the XAMPP to reconfigure itself to new path.

2) Take note that PHP in this package needs the Microsoft Visual C++ 2008 Redistributable package from http://www.microsoft.com/en-us/download/details.aspx?id=5582. Please ensure that the VC++ 2008 runtime libraries are installed on your system.

3) If XAMPP is installed to a PC running VMWARE, there may be a Port 443 Conflict issue, refer http://setup-steps.blogspot.com/2013/01/xampp-and-vmware-workstation-on-windows.html for troubleshooting.

4) Run Apache if you want to run a Web Server and PHP application.

5) If you want to run Java application, run Tomcat.

6) If you need a database server, run MySQL.

XAMPP and VMWARE Workstation on Windows

copied from: http://edwardsamuel.wordpress.com/2012/06/27/port-conflict-vmware-8-workstation-vs-apache-2-xampp/


By default, when you install VMWare 8 Workstation and Apache 2 (or XAMPP), you can’t run these programs in same host. Both of them use port 443. So, when you have Apache 2 running, you can’t start VMWare 8 Workstation and vice versa. If you want to run both, you must tell one of them to not use port 443.

Apache 2 Configuration
1) Open your Apache 2 configuration directory (if you use XAMPP for Windows, the default directory C:\xampp\apache\conf)

2) Open extra folder

3) Edit httpd-ssl.conf

4) Find all 443 and replace with 4431 (or else)

5) Restart Apache

Conclusion: Apache SSL module usually use port 433. By editing the Apache configuration, you can configure port usage. And now, SSL module use port 4431 (or else).

Friday, January 25, 2013

Flash Builder 4.6 - Windows


1) Download from http://download.adobe.com/pub/adobe/flex/win/FlashBuilder_4_6_LS10.exe

2)

Android ADT Bundle on Centos 6.3


Setup steps for Android ADT Bundle on Centos 6.3


1) Go to http://developer.android.com/sdk/index.html . Scroll down to section "DOWNLOAD FOR OTHER PLATFORMS/ADT Bundle".


2) In Centos 6.3, run Terminal Window as Root.

[centos@localhost ~]$ su 
Password: 


3) If your Centos 6.3 doesn't have Java, install Java first.
[root@localhost centos]# yum install java 

4) Download ADT bundle:
[root@localhost centos]# wget http://dl.google.com/android/adt/adt-bundle-linux-x86.zip 

4) Unzip the zipped ADT file
[root@localhost centos]# unzip adt-bundle-linux-x86.zip 

5) Move the extracted folder to /opt
[root@localhost centos]# mv adt-bundle-linux-x86 /opt 

6) The executable eclipse program is ready for execution
[root@localhost centos]# cd /opt/adt-bundle-linux-x86/eclipse 
root@localhost centos]# ./eclipse  

7) As an alternative to Step 6, we can register the path so that Centos recognize eclipse name called from any location. Follow steps 8-11.

8) Create eclipse executable binary file

[root@localhost centos]#  touch /usr/bin/eclipse 

9) Set permission to the file
[root@localhost centos]#  chmod 755 /usr/bin/eclipse 

10) Create the file using VI editor
[root@localhost centos]#  vi /usr/bin/eclipse 

11) Add entries to the file
export ECLIPSE_HOME="/opt/adt-bundle-linux-x86/eclipse"
$ECLIPSE_HOME/eclipse $*


12) Now you can just type eclipse in the terminal and Centos would know where to find its binary file.

The following is the ADT Splash Screen (a modified Eclipse)


Android SDK and Eclipse on Centos 6.3


1) Refer main download site for Android Software Development Kit (SDK):
http://developer.android.com/sdk/index.html

2) Copy the download link.
android-sdk_r21.0.1-linux.tgz


3) Run Centos Terminal. Switch to root user.


4) Download the zipped SDK
wget http://dl.google.com/android/android-sdk_r21.0.1-linux.tgz

The file will be downloaded to /home/centos directory.

5) Unzip the zipped SDK
tar -xvzf android-sdk_r21.0.1-linux.tgz 


 6) Move SDK file
mv android-sdk-linux /opt/android-sdk-linux


7) Change Directory Access Mode
chmod -R a+w /opt/android-sdk-linux

8) Edit Bash Profile
vi $HOME/.bash_profile

9) Add the following code before the last line.
PATH=$PATH:/opt/android-sdk-linux/tools:/opt/android-sdk-linux/platform-tools


10) Run Eclipse.

11) Go to Help/Install New Software.
Type "https://dl-ssl.google.com/android/eclipse/" at text box labeled "Work with"
Click Add.
Click Select All.
Click Next.


11) Review items to be installed. Click Next.


12) At the time of this writing, there is probably a bug that halts installation.


The Details section says:
Cannot complete the install because one or more required items could not be found.

  Software being installed: Android Development Tools 21.0.1.v201212060256-543035 (com.android.ide.eclipse.adt.feature.group 21.0.1.v201212060256-543035)

  Missing requirement: Android Development Tools 21.0.1.v201212060256-543035 (com.android.ide.eclipse.adt.feature.group 21.0.1.v201212060256-543035) requires 'org.eclipse.wst.sse.core 0.0.0' but it could not be found
Read more here, http://stackoverflow.com/questions/14465960/unable-to-install-adt-in-win7-64-bit .


13) Alternatively, you may try installing a complete ADT. Follow this, http://setup-steps.blogspot.com/2013/01/android-adt-bundle-on-centos-63.html .


Install Eclipse Classic 4.2.1 in RHEL/CentOS 6.3/5.6, Fedora 17-12

copied from: http://www.tecmint.com/install-eclipse-classic-in-rhel-centos-fedora/
cached image


Install Eclipse Classic 4.2.1 in RHEL/CentOS 6.3/5.6, Fedora 17-12

Eclipse is an open source and free multi-language and multi-platform software development program that used to build JAVA based web applications. It is written in Java program and can be used to develop Java based applications and other various plugins, including languages like C,C++PHPPerlPythonRuby and Rails framework.
Install Eclipse SDK Juno
Install Eclipse 4.2.1 in RHEL / CentOS / Fedora
It provides common UI (User Interface) navigation model for working with tools and it was developed to run on multiple OS (Operating Systems) by providing robust integration with each OS. Eclipse was one of the first IDE’s (Integrated Development Environment) program to run under GNU operating system.

This guide shows you how to install latest version of Eclipse Classic 4.2.1 on RHEL 6.3/6.2/6.1/6/5.8/5.6CentOS 6.3/6.2/6.1/6/5.8/5.6 and Fedora 17,16,15,14,13,12using Eclipse source files.

Install Eclipse Classic 4.2.1 in RHEL, CentOS and Fedora

Install Java SDK 6

First, you need to install Java SDK 6 package using the following YUM command.
# yum install java

Download Eclipse Classic 4.2.1

Download Eclipse Classic 4.2.1 for system OS bit, by choosing following link with Wgetcommand or you can also download it from http://www.eclipse.org/downloads/?osType=linux.
For RHEL/CentOS/Fedora 32-bit OS
# wget http://ftp.jaist.ac.jp/pub/eclipse/eclipse/downloads/drops4/R-4.2.1-201209141800/eclipse-SDK-4.2.1-linux-gtk.tar.gz
For RHEL/CentOS/Fedora 64-bit OS
# wget http://ftp.jaist.ac.jp/pub/eclipse/eclipse/downloads/drops4/R-4.2.1-201209141800/eclipse-SDK-4.2.1-linux-gtk-x86_64.tar.gz
THE FILE WILL BE DOWNLOADED TO /HOME/CENTOS DIRECTORY

Extracting Eclipse Classic 4.2.1

Unpack it under /opt directory with the help of Tar command with -C switch. For more examples of tar command visit THIS PAGE.
## For 32-Bit OS ##
# tar -xvzf eclipse-SDK-4.2.1-linux-gtk.tar.gz -C /opt

## For 64-Bit OS ##
# tar -xvzf eclipse-SDK-4.2.1-linux-gtk-x86_64.tar.gz -C /opt

Setting Execute Permissions to Eclipse files

Set executable permission on all files under eclipse directory.
# chmod -R +r /opt/eclipse

Creating Eclipse executable Binary file

Create eclipse executable binary file and set permission to it as shown below.
# touch /usr/bin/eclipse
# chmod 755 /usr/bin/eclipse
Create the following file with VI editor.
# vi /usr/bin/eclipse
Add the following lines to it save and close the file.
export ECLIPSE_HOME="/opt/eclipse"

$ECLIPSE_HOME/eclipse $*

Creating GNOME Desktop Launcher

Create the GNOME desktop launcher file for eclipse with VI editor.
# vi /usr/share/applications/eclipse.desktop
Add the following lines of code it, save and close the file.
[Desktop Entry]
Encoding=UTF-8
Name=Eclipse
Comment=Eclipse SDK 4.2.1
Exec=eclipse
Icon=/opt/eclipse/icon.xpm
Terminal=false
Type=Application
Categories=GNOME;Application;Development;
StartupNotify=true

Starting Eclipse Launcher

From Desktop terminal run the following command to launch Eclipse.
# eclipse

Eclipse Screenshots

Check out running Eclipse screenshots under my CentOS 6.3 system.
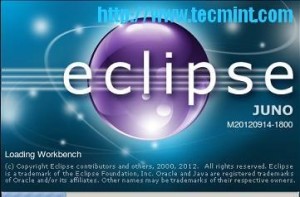
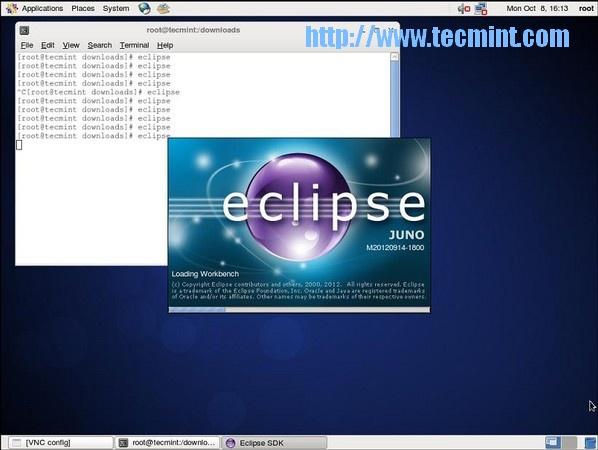
Eclipse Startup Screen
Start Eclipse SDK
Eclipse Startup Screen
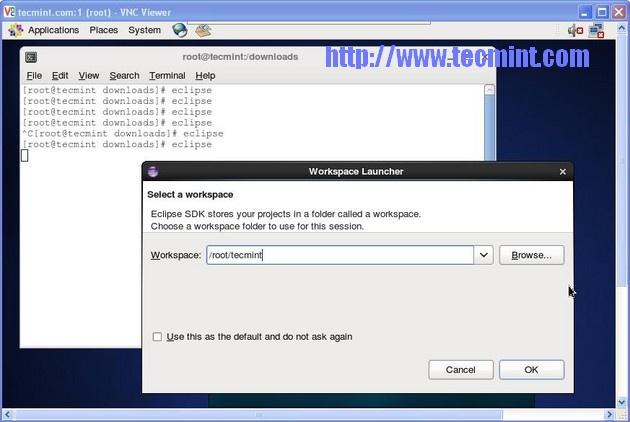
Eclipse Create WorkPlace
Eclipse Create WorkPlace Screen
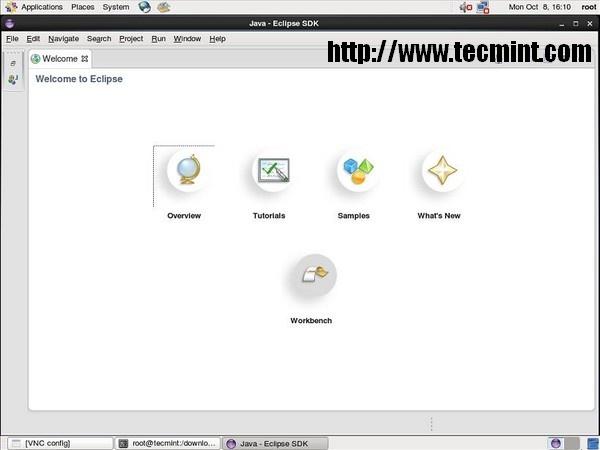
Eclipse Welcome Screen
Eclipse Welcome
Eclipse Welcome Screen


CentOS 6.3 Step by Step Installation Guide with Screenshots

copied from: http://www.tecmint.com/centos-6-3-step-by-step-installation-guide-with-screenshots/
view cached page.


CentOS 6.3 Step by Step Installation Guide with Screenshots

This post will guide you a step-by-step installation of Community ENTerprise Operating System 6.3 (CentOS) with screenshots. Less than three weeks after the release of Red Hat Enterprise Linux (RHEL) 6.3. The CentOS Project has released its clone of RHEL 6.3distribution on 09 July 2012.

CentOS 6.3 Features

CentOS Linux Distribution contains some new exciting features like.
  1. OpenOffice 3.2 has been replaced by LibreOffice 3.4, if you update from previous version of CentOS 6 using ‘yum update’ and have openoffice installed, the update will automatically remove openoffice and install libreoffice.
  2. Many drivers have been updated and improved in virtulisation.
  3. Upstream has deprecated the Matahari API for operating system management has been deprecated, and there’s new tools for moving physical and virtual machines into Virtual KVM machine instances. These new tools from Red Hat are virt-p2v and virt-v2v for physical-to-virtual and virtual-to-virtual migration, respectively.

Download CentOS 6.3 DVD ISO

  1. Download CentOS 6.3 32-bit DVD ISO – (3.6 GB)
  2. Download CentOS 6.3 64-bit DVD ISO – (4.0 GB)
  3. Download both 32-bit and 64-bit DVD ISO.

CentOS 6.3 Step by Step Graphical Installation Guide

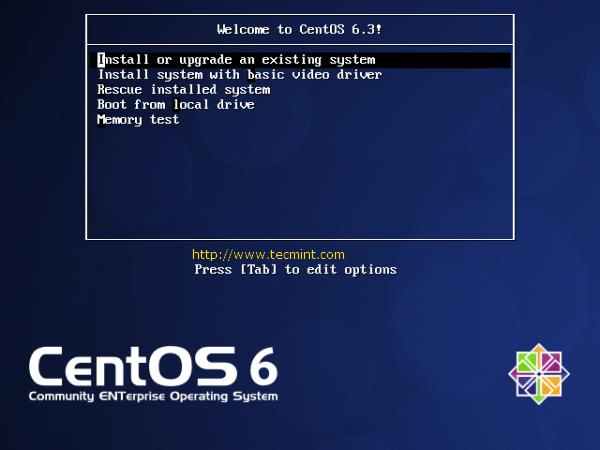
Boot Computer with CentOS 6.3 OS Installation CD/DVD.

1. Select Install or Upgrade existing system options.
Select Install or Upgrade
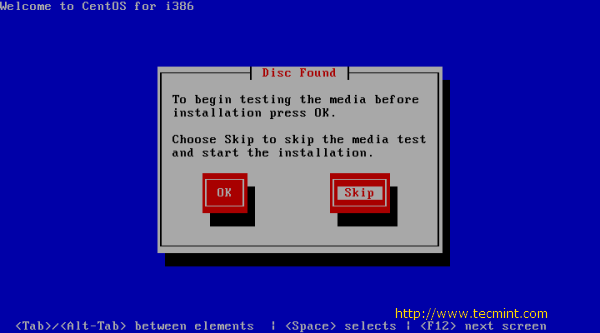
2. Choose skip media test as it may take long time to check media.
Skip CentOS 6.3 Media Test
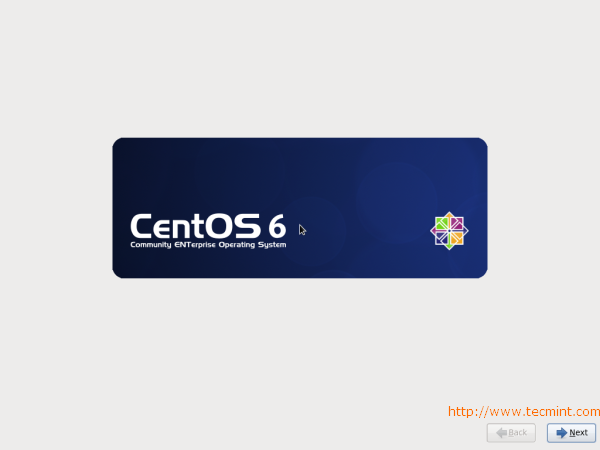
3. CentOS 6.3 Welcome Screen press Next.
CentOS 6.3 Welcome Screen
4. Language Selection.
CentOS 6.3 Language Selection
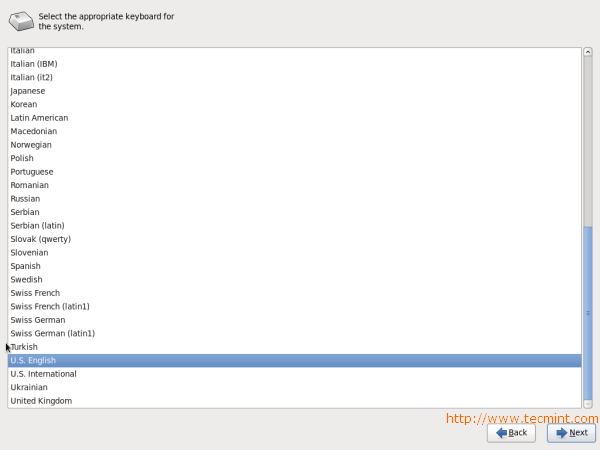
5. Select appropriate Keyboard.
CentOS 6.3 Keyboard Selection
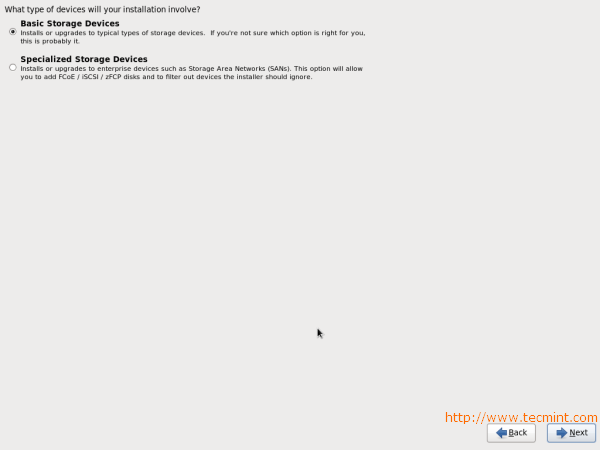
6. Select Basic Storage Device if your hard drive is attached locally.
CentOS 6.3 Storage Device Selection
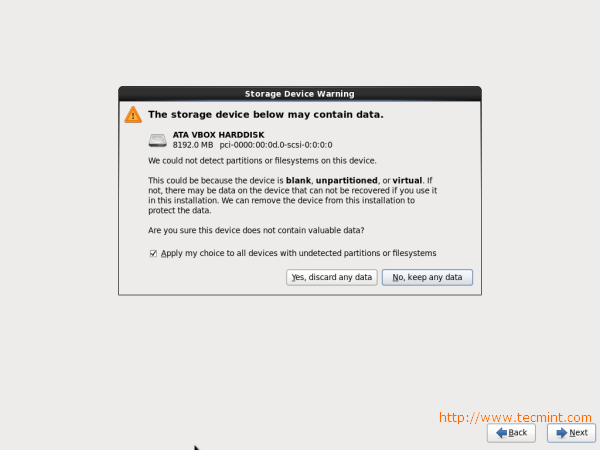
7. You may get Storage Device warning, you can click Yes, discard any data button toContinue.
CentOS 6.3 Storage Device Warning
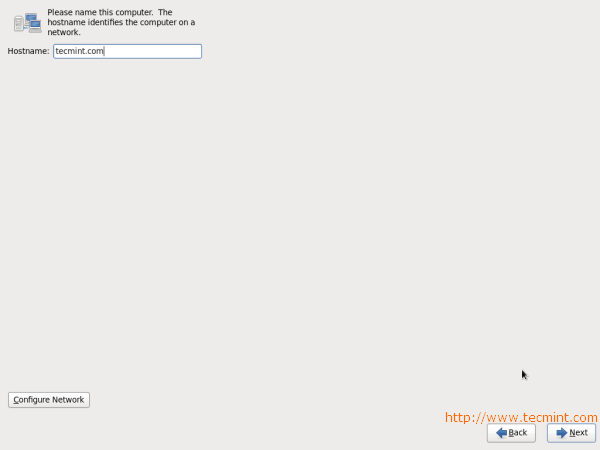
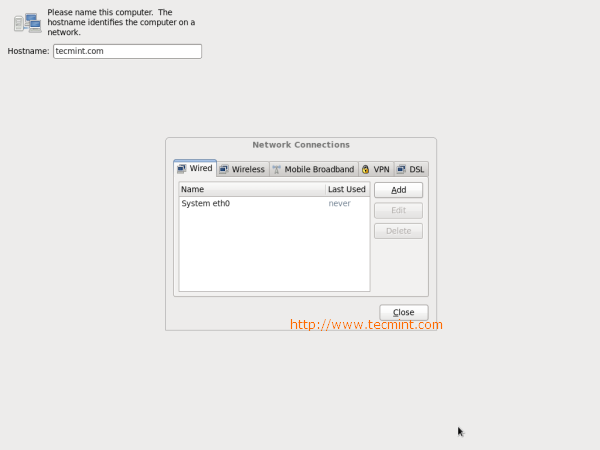
8. Give a Hostname to the server and click on Configure Network button if you want to configure network while installation.
CentOS 6.3 Hostname and Network Setup
9. Click Wired tab and click on Add button.
CentOS 6.3 Network Setup
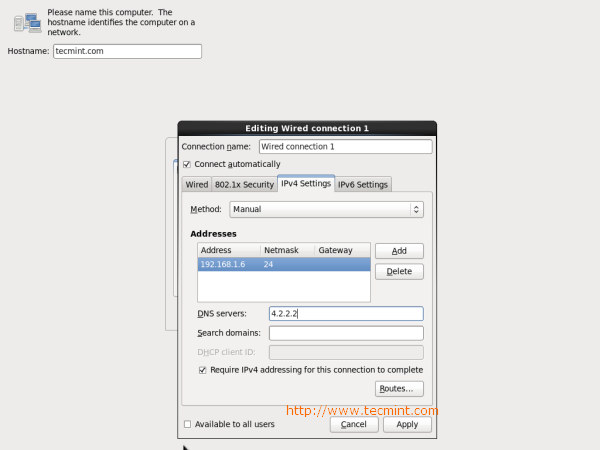
10. Select Connect Automatically, go to ipv4 settings tab and select Method and selectManual in drop down. Click on Add tab to fill address box with IP AddressNetmask,Gateway and DNS Server. Here I’m using IP Address 192.168.1.6 and DNS Server is 4.2.2.2 for demo. This IP Address may vary in your environment.
CentOS 6.3 Network Configuration
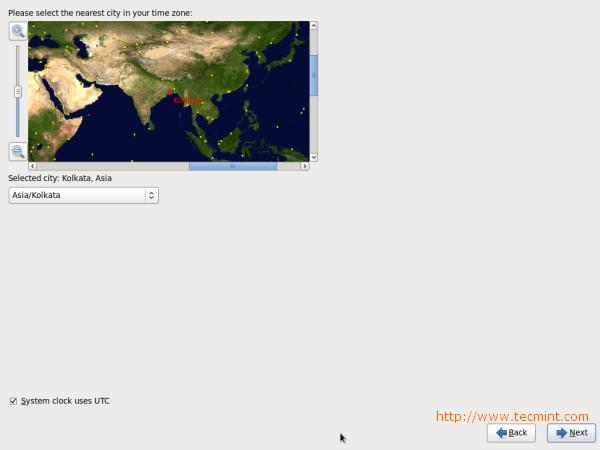
11. Select Time Zone.
CentOS 6.3 Set Timezone
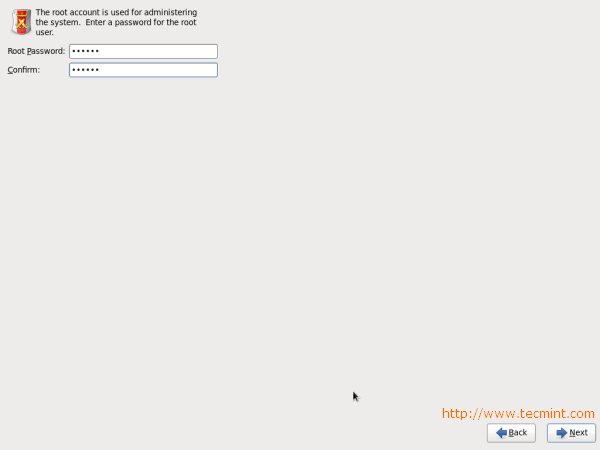
12. Give a root password.
CentOS 6.3 root Password
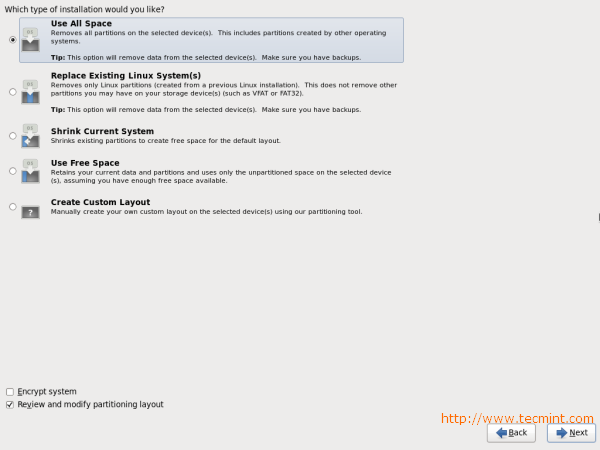
13. Select appropriate partitioning as per your requirement.
CentOS 6.3 Partition Selection
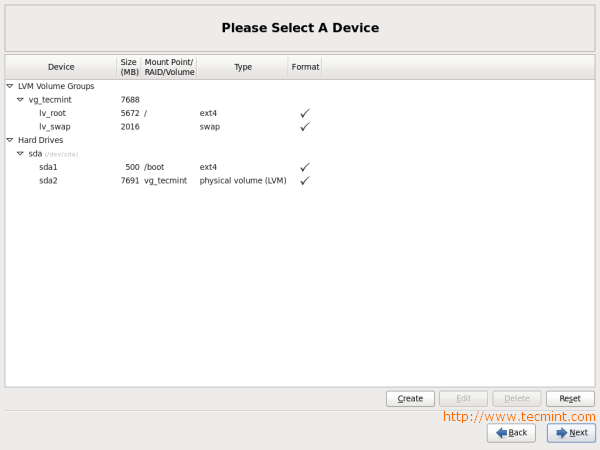
14. Verify filesystem. Here, you can edit filesystem If you want.
CentOS 6.3 Partition Verify
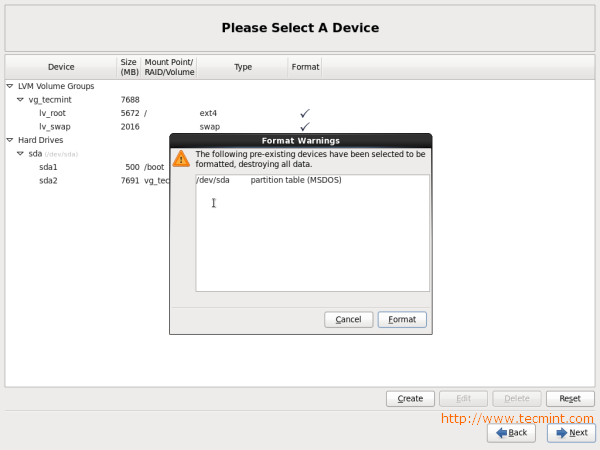
15. Disk Format Warning, click on Format.
CentOS 6.3 Disk Format
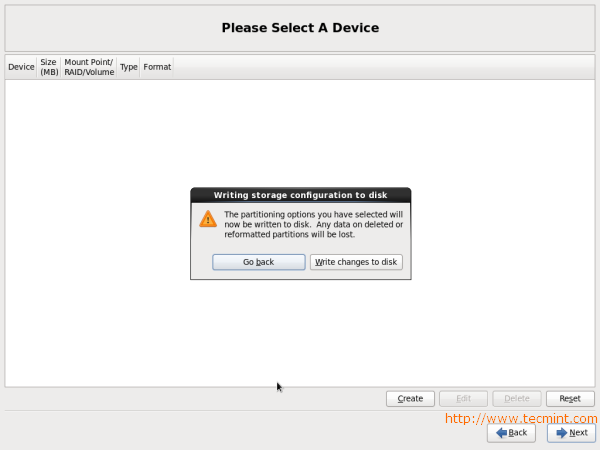
16. Select Write Changes to disk.
CentOS 6.3 Disk Changes
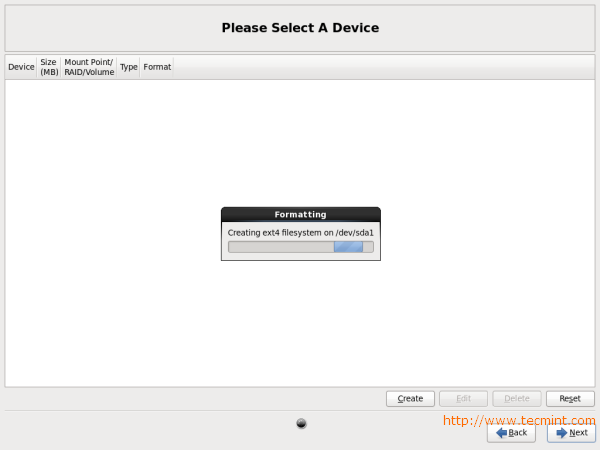
17. Hard Drive is Formatting.
CentOS 6.3 Disk Formatting
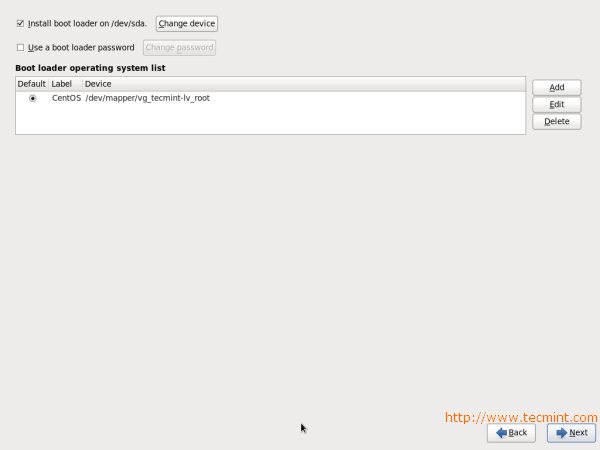
18. Here, you can give Boot loader Password for better security.
CentOS 6.3 Boot Loader Password
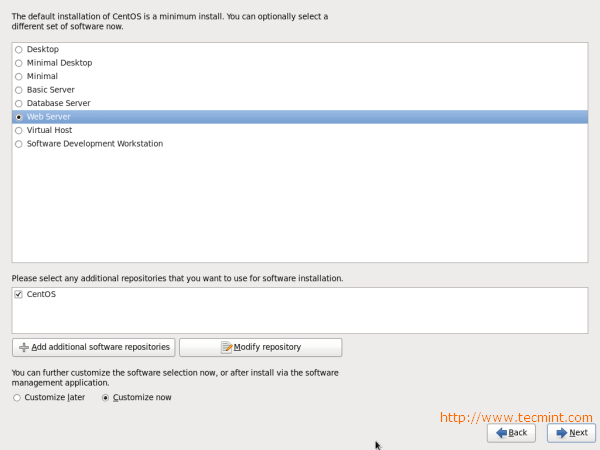
19. Select the applications you want to install, you can choose Customize now and click Next.
CentOS 6.3 Package Selection
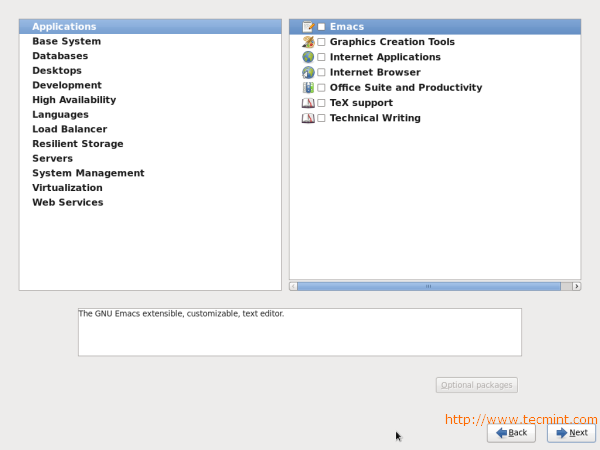
20. Select the applications you want to install and click Next.
CentOS 6.3 Packages Selection
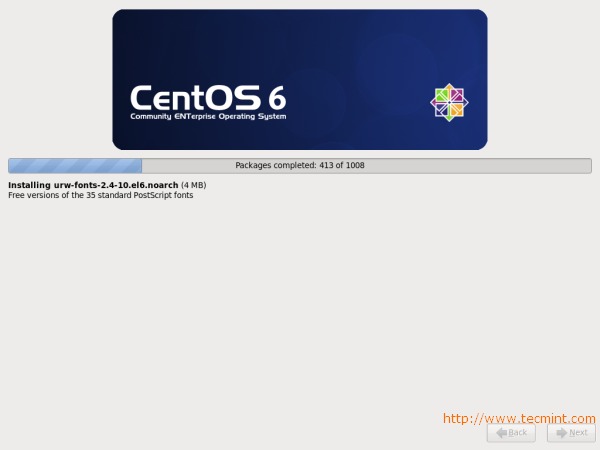
21. Installation started, this may take several minutes as per selection of packages.
CentOS 6.3 Installation
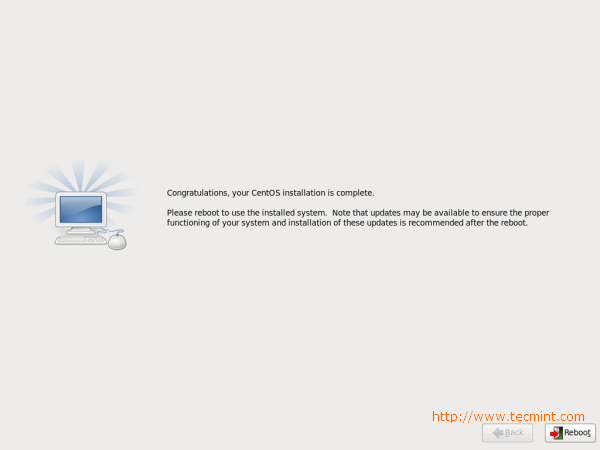
22. Installation completed, Please remove CD/DVD and reboot system.
CentOS 6.3 Installation Completes
23. Welcome to CentOS 6.3 Login Screen.
CentOS 6.3 Login Screen
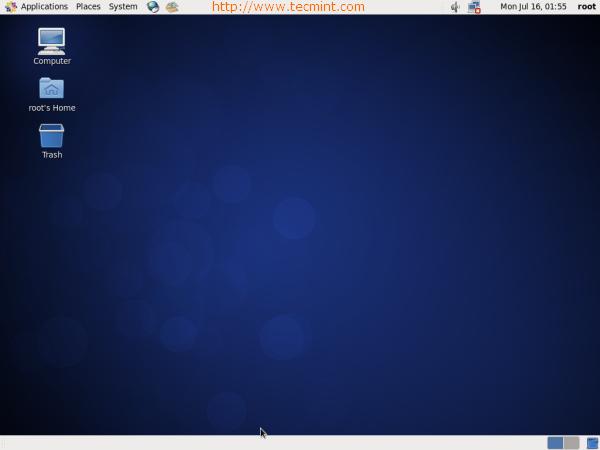
24. CentOS 6.3 Desktop Screen.
CentOS 6.3 Desktop Screen
Liked the article? Sharing is the best way to say thank you!