.
Google App Engine: Getting Started
1) Login into Google Cloud Platform
Notice the Side Menu button.
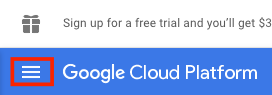
Expand the menu.
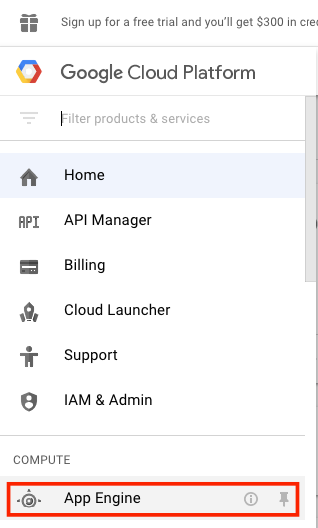
Select App Engine.
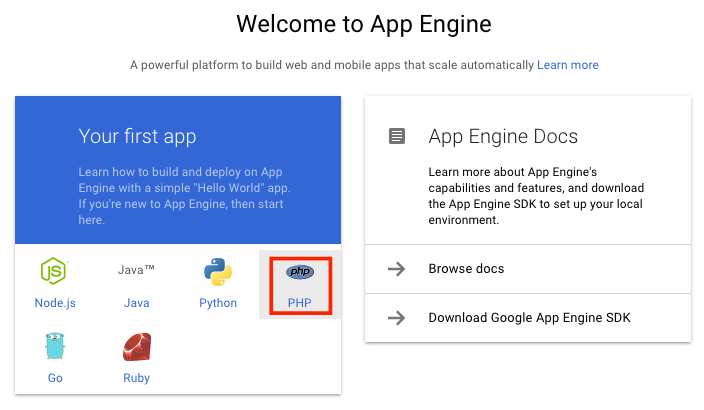
Select Language (PHP).
Specify your location.

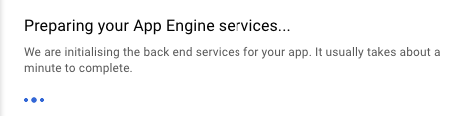
Wait.
Follow the tutorial.

2) Tutorial
2.1. App Engine Quickstart
INTRODUCTION
This tutorial shows you how to deploy a sample PHP application to Google App Engine using the gcloudcommand.
Here are the steps you will be taking.
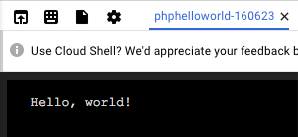
- Build and run your "Hello World" app
- You will learn how to run your app using Google Cloud Shell directly in your browser. At the end you'll deploy your app to the Web using the gcloud command.
- After the app...
- Your app will be real and you'll be able to experiment with it after you deploy, or you can remove it and start afresh.
2.2. App Engine Quickstart
Google Cloud Platform organises resources into projects. This allows you to collect all the related resources for a single application in one place.

Click Continue or click “Select a different project” to create a new project.

Wait.
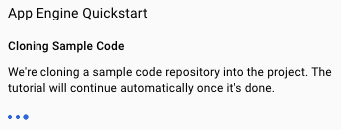
2.3. VIEW SAMPLE CODE
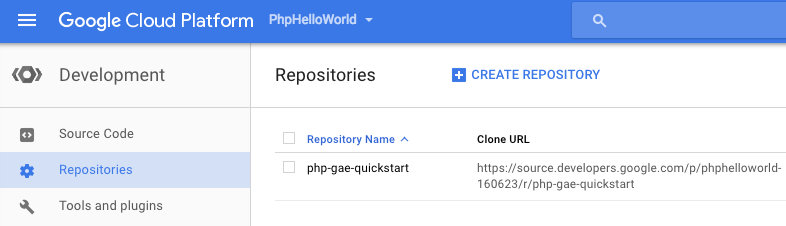
We have the sample PHP code prepared for you in the Google Cloud Repository. To view your cloned code, open the menu on the left -hand side of the console and select Development.

2.4. CONFIGURING YOUR DEPLOYMENT
- YAML files
- You are now looking at the Hello World folder of the cloned code. Google App Engine uses YAML files to specify a deployment's configuration. The app.yaml file configures the deployment environment.
- Open the app.yaml file by left-clicking it.
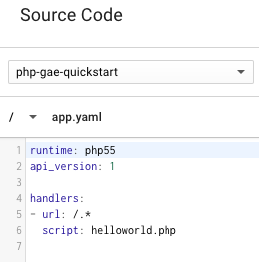
app.yaml files contain information about your application, including the runtime environment, URL handlers and more.
|
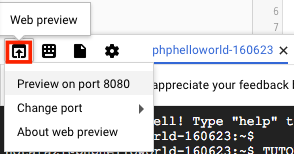
2.5. USING GOOGLE CLOUD SHELL
Cloud Shell is a built-in command line tool for the console. We're going to use Cloud Shell to deploy our app.
- Using Google Cloud Shell
- Open Cloud Shell by clicking
- from the navigation bar at the top.

Cloud Shell is a built-in command line tool for the console. We're going to use Cloud Shell to deploy our app.
|
TUTORIALDIR=~/src/phphelloworld-160623/php_gae_quickstart-2017-03-06-07-34
|
git clone https://github.com/GoogleCloudPlatform/appengine-try-php.git $TUTORIALDIR
|
cd $TUTORIALDIR
|
git checkout gcloud
|

dev_appserver.py --php_executable_path=/usr/bin/php-cgi $PWD
|
Preview.

2.6. CREATE THE APPLICATION
In order to deploy our app, we need to create an App Engine application. This sets up the app and selects a region.
- Creating the app with Cloud Shell
- To create your app enter:
gcloud app create
|


gcloud app deploy
|


gcloud app browse
|

2.7. Deploying with Cloud Shell
You can use Cloud Shell to deploy your app. To deploy your app, enter:
gcloud app deploy app.yaml --project phphelloworld-160623
|


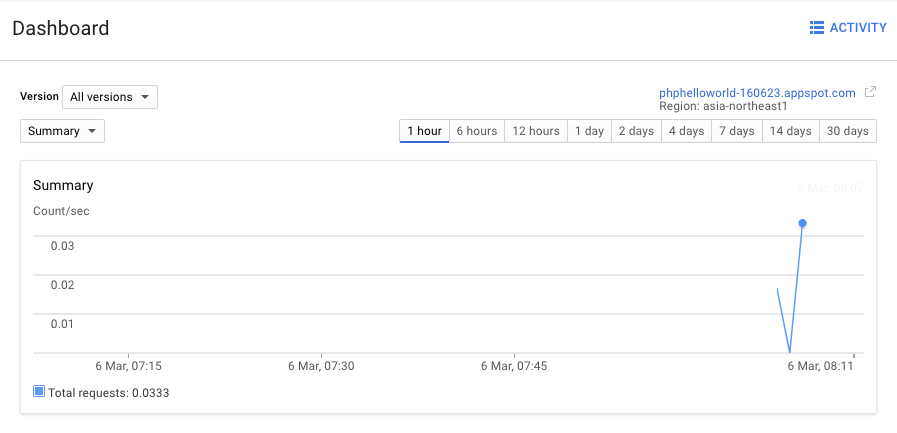
2.8. View your app's status
You can check up on your app by monitoring its status on the App Engine dashboard.
Open the menu on the left-hand side of the console and select App Engine.

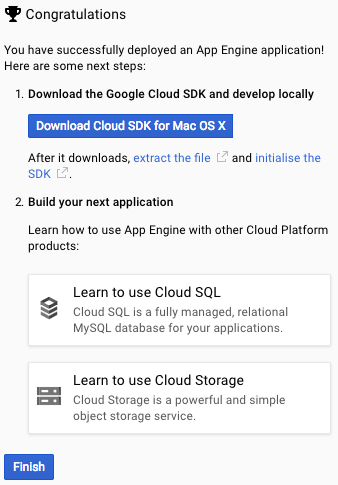
2.9. Congratulations
You have successfully deployed an App Engine application! Here are some next steps:
- Download the Google Cloud SDK and develop locally
- Download Cloud SDK for Mac OS X
- After it downloads, extract the file and initialise the SDK .
- Build your next application
- Learn how to use App Engine with other Cloud Platform products