Notepad++ as a Java IDE
♥ Notepad++ is one of the best editors, simple yet powerful.
♥ It can easily be used to compile and run Java programs.
♥ You can put Notepad++ and Java on a USB drive and program in Java everywhere!
♥ Thus it is a simpler, more streamlined alternative to Eclipse.
[If you can't get this to work, use Eclipse - but it won't run off a USB drive.]
♦ Unfortunately, unlike Java, it only runs on Windows.
In this article I’ll explain how to setup Notepad++ and Java so that you can use Notepad++ to compile and run Java programs.
These instructions are to set things up so that everything run on a USB flash drive.
If you want to install the programs onto your hard drive (i) you can download Notepad++ instead of Notepad++ Portable, and (ii) you need to find and use the correctpath to javac.exe (and java.exe) — instead of “\java\jdk1.7.0_11\bin\javac”. It will probably be something like “C:\program files\java\…” .
Also, as new versions of Java come out you’ll have to modify the path to the correct version number.
There are 4 parts to this:
- installing Java JDK
- installing Notepad++ portable
- adding scripts to Notepad++
- testing everything by compiling and running a Java program
♣ Part 1: install Java 7 JDK
(JDK means Java Development Kit — which is what you need in order to compile Java programs.)
- Go to: http://www.oracle.com/technetwork/java/javase/downloads/index.htmlClick on the appropriate button (as seen below) to do to the download page
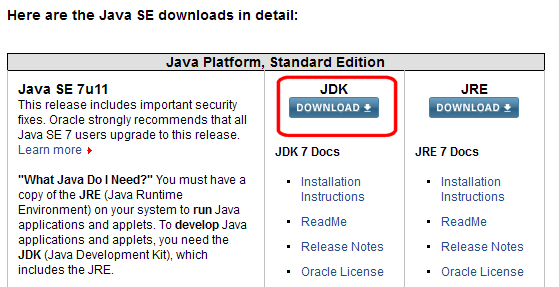 .
. - On the next screen (see below) select
Windows x86 for 32 bit windows(e.g. jdk-7u11-windows-i586.exe) or
Windows x64 or for 64 bit windows( e.g. jdk-7u11-windows-x64.exe)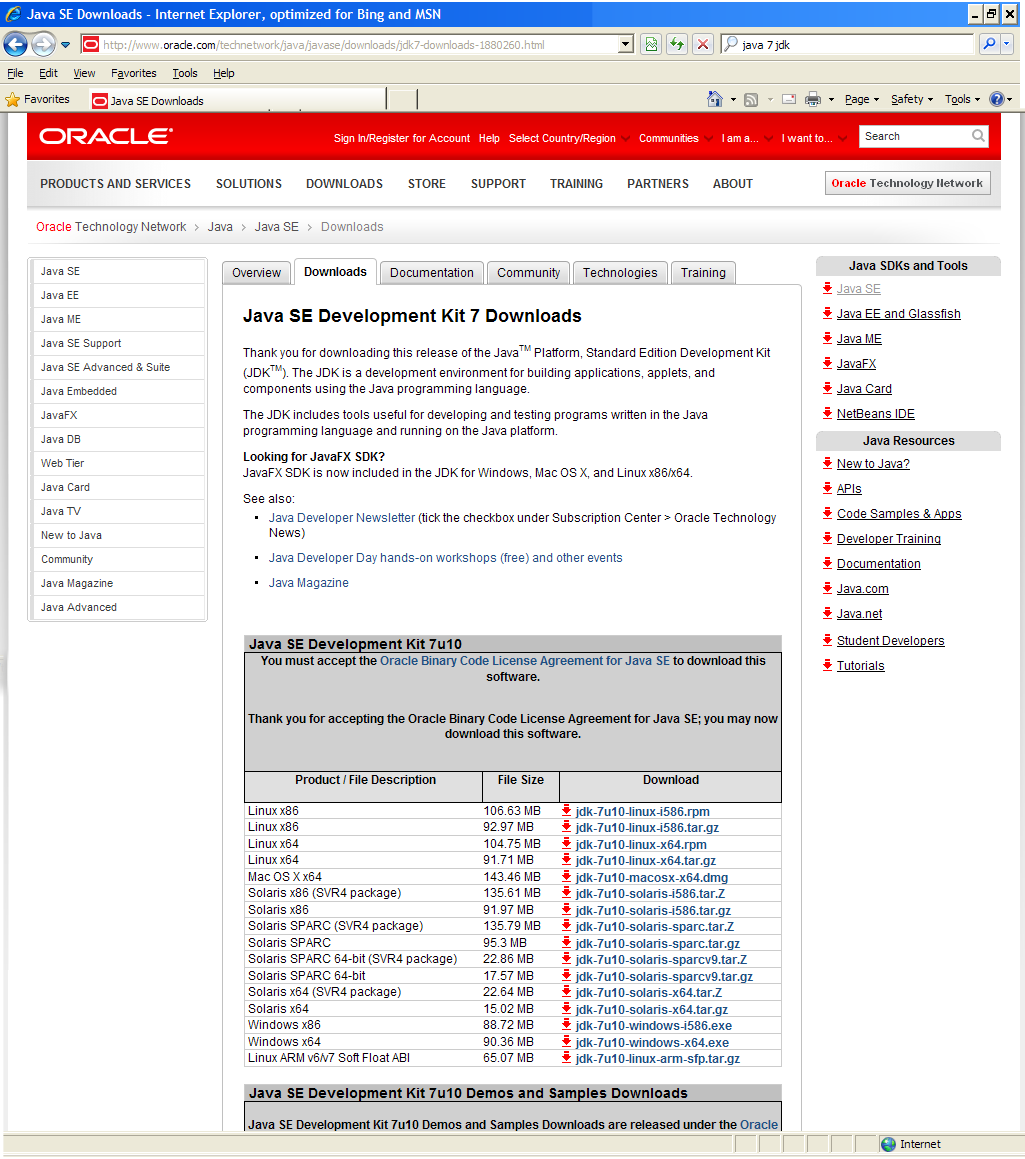
- Next, install the JDK file you downloaded (jdk-7u11-windows-i586.exe) by clicking on it and choosing the default options..
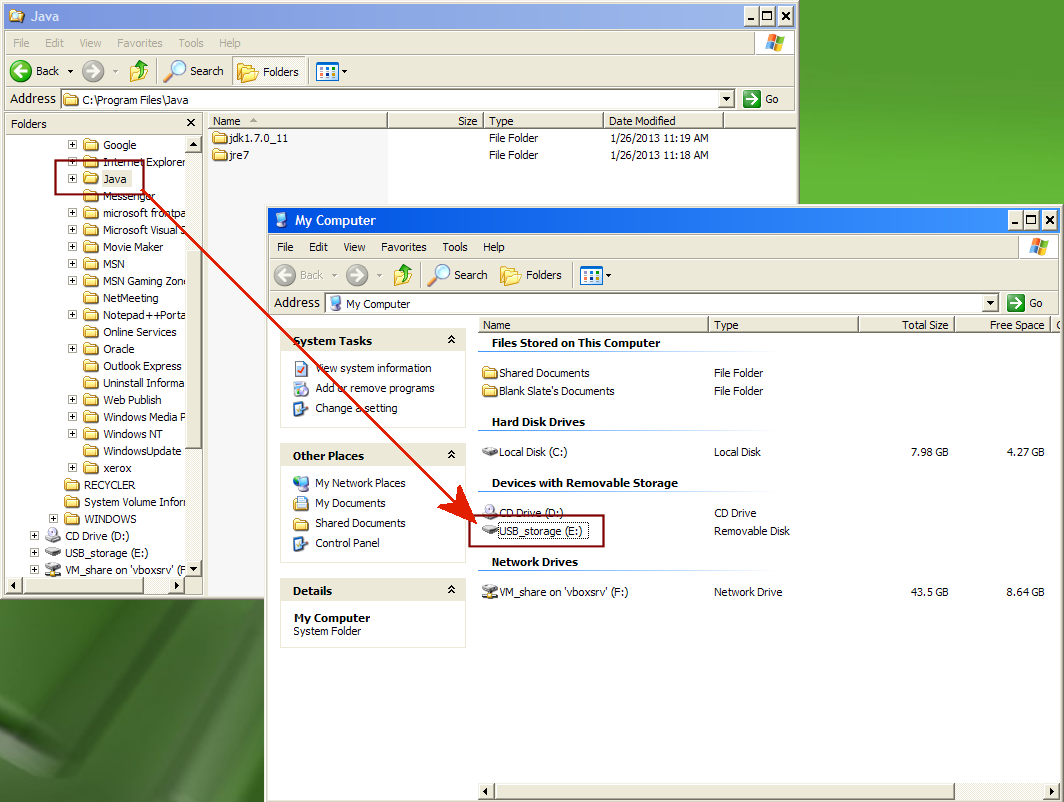
- Now copy the folder C:\Program Files\Java to your USB flash drive (e.g. to M:\Java)
♣ Part 2: download, install, configure Notepad++ 
- Go to: http://portableapps.com/apps/development/notepadpp_portable
 .
. - Download Notepad++ and Install it to your USB drive.
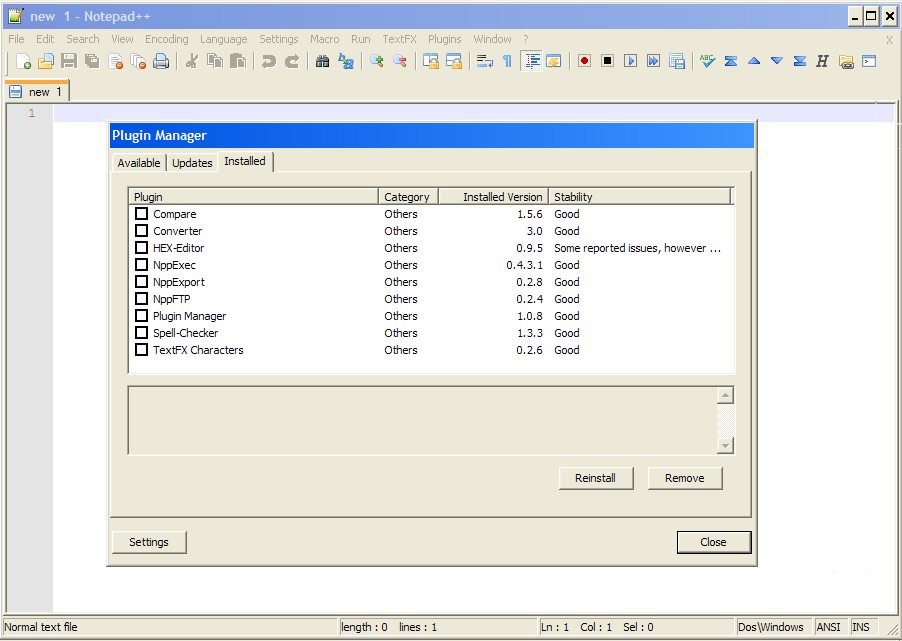
- Now run Notepad++, and go to the menu option Plugins/Plugin Manager/Show Plugin Manager and install these plugins.
- “Compare” is very useful for comparing versions of documents or source code
- “NppExec” is essential for compiling Java code
- “TextFx Characters” has the ability to automatically indent your code
- “Hex-Editor” is optional. You have to click on “Settings” and then “Show Unstable Plugins” to be able to install it.
 .
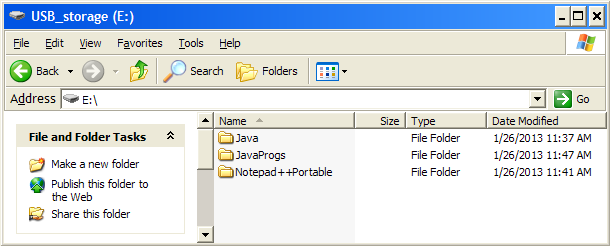
. - Notepad++ Portable is now correctly installed on your USB flash drive (presumably, that’s where you installed it). You should also probably make a folder for where you’ll be storing your programs (I called it JavaProgs).
♣ Part 3: adding scripts to Notepad++
Unfortunately, I’m getting tired of making all of these screen shots. Most of this section is written instructions.
- Enter new commands that show up in the Macros menu by doing the following:
- Plugins/NppExec/Execute… (or Press F6)
- You’ll see a box that says “Temporary Script”
Paste in this code: - Click “Save…”
- Then type in “Java-Compile” (this is the name of your script) and click Save
- You then get back to the previous screen and have the choice of clicking OK or CANCEL. Click “Cancel” which exits NppExec without running the script (OK would run it)
- “Java-compile” is used to compile your programs. (If you have a different path, you will have to modify the scripts.)
- Go back to Plugins/NppExec/Execute… (or Press F6) and repeat these steps to enter the following scripts
- Note: first select “Temporary Script” to clear the box so that you can paste in the next script
- “Java-run” is the name of this second script. It will run the Java program after it has been compiled.
- “Java-applet-HTML” is the name of this script. It is used to make a very simple HTML file for running Java applets. [Don't bother with C and D unless you plan to use applets.] Note: I can’t find any way of not displaying > and < If I use the > and < symbols, then the code is treated as HTML instead of plain text. I also can’t use < WordPress is just screwed up.
- “Java-applet-run” is the name of the fourth script. It is used to run an applet after it has been compiled and the HTML file created.
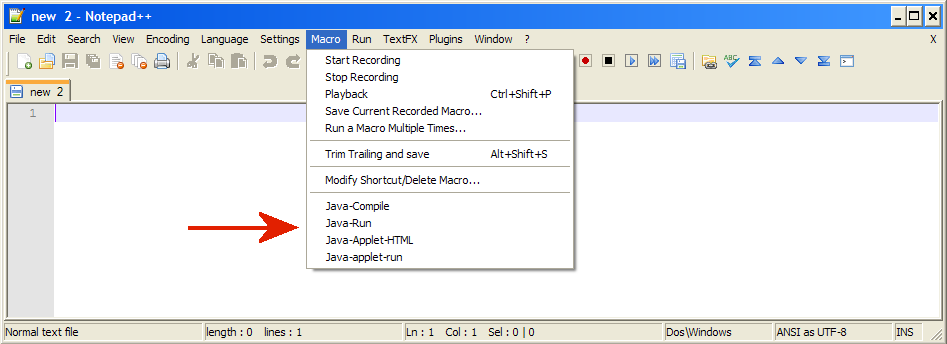
- Now we add the scripts to the Macros menu.
- go to the submenu Plugins/NPPexec/Advanced Options
- select script from “Associated Script” combo box. It will automatically fill in the “Item Name”
- now click the “Add/Modify” button
- Check the box at the top that says “Place to the Macros Submenu”
- Click OK. This will exit the Advanced Options box and say that NotePad++ needs to be restarted (don’t restart it until all 4 scripts have been added).
We have to click OK because it’s the easiest way of clearing the boxes to add the next script otherwise it’s likely to overwrite the existing menu option. - Repeat these steps to add the other 4 scripts.
- Close Notepad++ and restart it.
- When you’re done, click on the Macros Menu and you should see the 4 Java scripts (not Javascript!) that we added at the bottom. (see below)
♣ Part 4: testing to make sure that everything works.
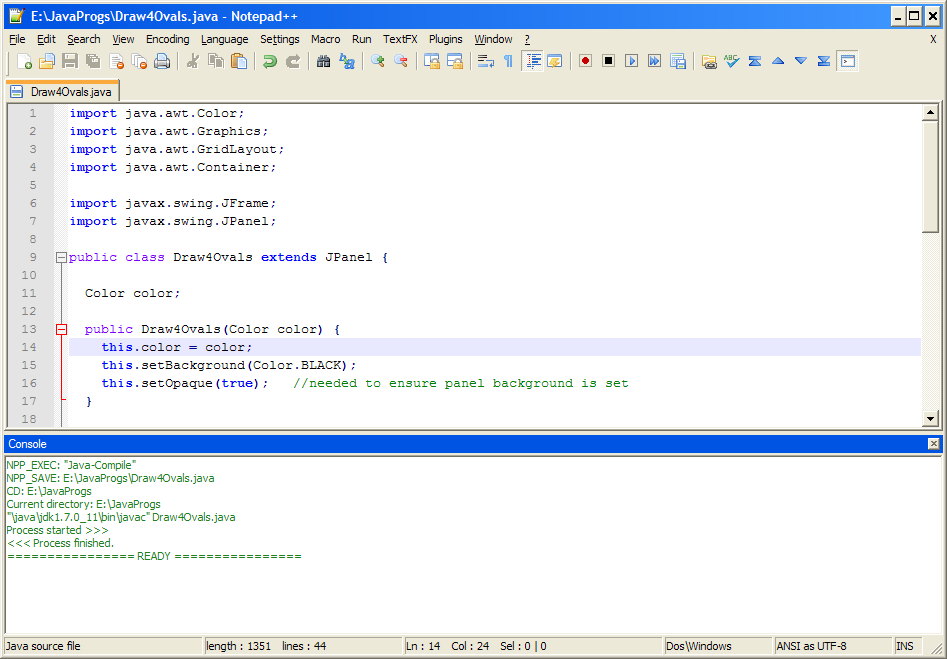
- copy and paste the following code into a Notepad++ window
- Save this file as “Draw4Ovals.java”. Upper-case is important. Once it is saved, you’ll see that Notepad++ does syntax highlighting.
- Select the Macros menu, then click on the Java-compile macro near the bottom. The results should look like this:
 .
. - Now select the macro “Java-run”. You should see this:
 .
. - If, in addition, you want to test an applet,
- paste the following code
- save it as “TestApplet.java”
- run “Java-compile”
- run “Java-applet-HTML”
- now either view the file in a browser, or else run “Java-applet-viewer”
- Note: ♦Applets are no longer used as much as other types of web-programming.
♦The Java-applet-HTML script just makes a very simple HTML page. If you want to put an applet in a webpage, you should actually make a decent webpage.
-----
Copied from: http://www.quarkphysics.ca/scripsi/java_notepad/
No comments:
Post a Comment