Learn the powerful enterprise adaptable database:

Getting Started With ADABAS & Natural

Saturday, March 16, 2013

Eclipse Liferay IDE 1.5.2: Setting Up Eclipse IDE For Liferay Development


This tutorial guides the reader to setup Eclipse for Liferay Development based on Liferay 6.1.1 CE GA1.

PRE-REQUISITES:
1) eclipse_Liferay_IDE_1.5.2_v201203040240-win32.zip
2) liferay-ide-eclipse-updatesite-1.5.2.zip (note: you will not use this throughout the tutorial but rather keep it as backup in case your eclipse is missing liferay update files)
3) liferay-plugins-sdk-6.1.0-ce-ga1-20120106155615760.zip
4) liferay-portal-tomcat-6.1.0-ce-ga1-20120106155615760.zip
-the above files can be downloaded from http://sourceforge.net/projects/lportal/files/
5) usbwlportal.zip (usbwebserver pre-configured with lportal database)
-the above file can be downloaded from http://sites.google.com/site/notaliferay/home/developer/usbwlportal.zip


STEPS:
1) Extract the zip file “liferay-portal-6.1.0-ce-ga1” to c:\. If you already have the same folder name, add a number to the end. e.g liferay-portal-6.1.0-ce-ga1-1. We will call this folder LIFERAY_HOME.


2) Extract the folder “eclipse” from the zip file “eclipse_Liferay_IDE_1.5.2_v201203040240-win32”  to LIFERAY_HOME. e.g. LIFERAY_HOME\eclipse .


3) Extract the SDK zip file “liferay-plugins-sdk-6.1.0-ce-ga1-20120106155615760” to LIFERAY_HOME. e.g. LIFERAY_HOME\liferay-plugins-sdk-6.1.0-ce-ga1-20120106155615760 .


4) Extract the usbwlportal.zip file to LIFERAY_HOME e.g. LIFERAY_HOME\usbwlportal


5) The final folder setup will be as follows:


6) Configure Eclipse.
6.1) Run Eclipse.


6.2) Set Workspace. Optionally, you may set relative path or empty ("").


6.3) Go to menu Help\About. Check that Liferay icon is present.


6.4) Go to menu Window\Preferences. We will follow the shortcut steps.


6.5) Configure installed Liferay Plugin SDKs.


6.6) Create new Liferay Runtime Environment
Select Tomcat 7.
Tick Create a new local server.


6.6.1) Set Tomcat and JRE directory. JRE is provided by default. Click Finish.


6.7) Check in Server\Runtime Environments to ensure Liferay Server has been added into the list. Click Ok.


7) The main window now displays Server Project.
At the bottom of the window, notice the Server Tab.
Start the server.
Unblock Firewall if any.
(note: To make the server load faster, you can delete all folders within webapp folder except ROOT folder.)


8) The console window will display output message. Wait until the messaging is done.


9) Right-click the Server. Select Open Liferay Portal Home.


10) Liferay Portal is displayed via Internal Web Browser.
This indicates that everything is alright up to this point.


11) Notice that in Database Section above, the Default Database is Hypersonic.
Hypersonic is a type of flat file database used for portal demonstration purpose.
If you want to run Liferay Portal for development or production purpose, you need to change to other types of database such as MySQL.


CHANGING DEFAULT DATABASE TO MYSQL

12) Before configuring Liferay Portal for MySQL connection, you need to setup lportal database at the MySQL server.

12a) Use the following commands to setup the database:

mysql -u root -p
create database YourDatabaseName character set utf8;
create user 'lportal'@'localhost' identified by 'YourDatabasePassword';
grant all privileges on YourDatabaseName.* to 'YourDatabasePassword';
flush privileges;


12b) Or download the pre-configured usbwebserver bundle, http://sites.google.com/site/notaliferay/home/developer/usbwlportal.zip?attredirects=0&d=1 , using username/password as liferay@localhost/password.

13) Click Change.


14) Enter the connection details and click finish.


15) Click Go to My Portal to start using the portal.


Friday, March 15, 2013

AppEngine: Google App Engine SDK for Python


1) Go to https://developers.google.com/appengine/downloads?hl=ca#Google_App_Engine_SDK_for_Python to download  Google App Engine SDK for Python.


2) Download and install. The installer will remind you to install Python 2.5.


3) Once installation is done, you will be prompted to launch the application.


4) Ready to deploy application to Google AppEngine (GAE)  server.


Follow this tutorial to deploy your first python application: http://basic-steps.blogspot.com/2013/03/appengine-deploying-python-to-appengine.html

Saturday, March 9, 2013

XCode 4.3 and iOS: Understanding Hello World App

copied from: http://www.appcoda.com/ios-programming-basic-how-does-the-hello-world-app-work/
-----
iOS Programming Basic: How Does the Hello World App Work?
   
 Share
I hope you enjoy the first iOS programming tutorial and already created your first app. Before we move onto the next tutorial and build a more complex app, let’s step back and have a closer look at the Hello World app. It’ll be good for you to understand some of the Objective-C syntax and the inner workings of the app.
So far you follow the step-by-step guide to build the Hello World app. But as you go through the tutorial, you may come across these questions:
  • What are those .xib, .h and .m file?
  • What are those “ugly” code inside “showMessage”? What do they mean?!
  • What actually happens after you taps the “Hello World” button? How does the button trigger the “showMessage” action?
  • How does the “Run” button in Xcode work?
I want you to focus on exploring the Xcode environment so I didn’t explain any of the above in the previous post. Yet it’s essential for every developer to understand the inner details behind the code and grasp the basic concept of iOS programming. For some technical concepts, they may be a bit hard to understand particularly you have no programming background. Don’t worry, however. This is just a start. As you move on and write more code in later tutorials, you’ll get better understanding about iOS programming. Just try your best to learn as much as possible.

Interface Builder, Header and Implementation Files

First, what are those .xib, .h and .m files? This is a very good question raised by one of the readers. Under the Project Navigator, you should find three main types of files – .xib, .h and .m. (If you expand the “Supporting Files” folder, you’ll find other file types such as plist and framework. But for now, let’s forget about them first. We’ll talk about them later.)
.xib – For files with .xib extension, they’re Interface Builder files that store the application’s user interface (UI). As you click on the .xib file, Xcode automatically switches to the Interface Builder for you to edit the UI of the app via drag-and-drop.
Hello World Interface Builder
Interface Builder in Xcode
.h and .m – Files with .h extension refers to the header files while those with .m extension are the implementation files. Like most of the programming languages, the source code of Objective-C is divided into two parts: interface and implementation.
Well, to put in analogy that you can better understand both terms, let’s consider a TV remote. It’s convenient to control the volume of a TV set wirelessly with a remote. To increase the speaker volume, you press the “Volume +” button. To switch channel, you simply key in the channel number. Let me ask you. Do you know what happens behind the scene when pressing the “Volume” button? Probably not. I believe most of us don’t know how the remote communicates with the TV set and controls the speaker volume. What we just know is, that button is used for changing the volume. In this example, the button that interacts with you is the “interface” and the inner detail which is hidden behind the button is referred as the “implementation”.
Now you should have a better idea about interface and implementation. Let’s go back to the code. In Objective-C, interfaces of a class are organized in “.h” file. We use the syntax “@interface” to declare the interface of a class. Take a look at the HelloWorldViewController.h, which is the header file:
1
2
3
4
5
@interface HelloWorldViewController : UIViewController

-(IBAction)showMessage;

@end
It starts with “@interface” followed by HelloWorldViewController, which is the class name. Inside, it declares a “showMessage” action, which is known as a method call.
Like the “Volume” button, apparently we do not know how the “showMessage” action works. You just know it’s used to display a message on screen. The actual implementation is put in the HelloWorldViewController.m, the implementation file:
1
2
3
4
5
6
7
8
9
10
11
12
13
14
@implementation HelloWorldViewController

// I've removed other methods for better reading. Focus on the showMessage method first.

- (IBAction)showMessage 
{
    UIAlertView *helloWorldAlert = [[UIAlertView alloc]
                                    initWithTitle:@"My First App" message:@"Hello, World!" delegate:nil cancelButtonTitle:@"OK" otherButtonTitles:nil];
    
    // Display the Hello World Message
    [helloWorldAlert show];
}

@end
As you can see from the above, you use the declaration “@implementation” to declare an implementation. Inside the “showMessage”, it’s the actual code defined to display the alert message on screen. You may not understand every single line of code inside the “showMessage” method. In brief, it creates an UIAlertView with “My First App” as the title and “Hello, World” as the message. It then calls up the “show” method and request iOS to display the pop-up message on screen.
Hello World App
Hello World App
It’s vital for you to understand the concept of interface and implementation. If you have any question, feel free to raise your question at our forum.

Behind the Touch and Tap

What actually happened after tapping the “Hello World” button? How does the “Hello World” button invoke the “showMessage” method to display the “Hello World” message?
Recalled that you established a connection between the “Hello World” button and the “sendMessage” action in Interface Builder. Try opening up the “HelloWorldViewController.xib” again and select the “Hello World” button. Click the “Sent Events” button in the Utility area to open the Sent Events.
Hello World Button Sent Events
The Sent Events section shows you all connections between events and actions. As you can see in the above figure, the “Touch Up Inside” event is connected to the “showMessage” action. In iOS, apps are event-driven. The control/object (e.g. UIButton) listens for certain events (e.g. touches and taps). When the event is triggered, the object calls up the preset action that associates with the event.
In our Hello World app, when users lift up the finger inside the button, the “Touch Up Inside” event is triggered. Consequently, it calls up the “showMessage” action to display the “Hello World” message.
The below illustration sums up the event flow and what I have just described.
HelloWorld Message and Event Flow
Event and Message Flow of Hello World App

Behind the Scene of the “Run” Button

When you click the “Run” button, Xcode automatically launches the Simulator and runs your app. But what happens behind the scene? As a programmer, you have to look into the entire process.
Xcode Build Process
The entire process can be broken into three phases: compile, package and run.
Compile – You probably think iOS understands Objective-C code. In reality, iOS only reads machine code. The Objective-C code is only for you, the programmer to write and read. To make iOS understand the source code of the app, we have to go through a translation process to translate the Objective-C code into machine code. This process is referred as “compile”. Xcode already comes with a built-in compiler to compile the source code.
Package – Other than source code, an app usually contains resource files such as images, text files, xib files, etc. All these resources are packaged to make up the final app.
We used to refer these two processes as the “build” process.
Xcode Build Option
Run – This actually launches the Simulator and loads your app.

XCode 4.3: Build Your First iPhone App Hello World

copied from: http://www.appcoda.com/hello-world-build-your-first-iphone-app/
-----
Hello World! Build Your First iPhone App
I hope you have configured your development environment properly with Xcode installed. If you haven’t done so, check out our previous article about what you need to begin iOS programming. We’ll use Xcode 4.3.2 to work on the tutorial. However, you can also Xcode 4.2 to build the app in case you can’t upgrade to the latest version of Xcode.
You may have heard of “Hello World” program if you have read any programming book before. It has become the traditional program for first-time learner to create. It’s a very simple program that usually outputs “Hello, World” on the display of a device. In this tutorial, let’s follow the programming tradition and create a “Hello World” app using Xcode. Despite its simplicity, the “Hello World” program serves a few purposes:
  • It gives you a better idea about the syntax and structure of Objective C, the programming language of iOS.
  • It also gives you a basic introduction of the Xcode environment. You’ll learn how to create a Xcode project and create user interface with the built-in interface builder.
  • You’ll learn how to compile a program, build the app and test it using the Simulator.
  • Lastly, it makes you think programming is not difficult. I don’t want to scare you away. :-)

Take a Look at Your First App

Before we go into the coding part, let’s first take a look at our version of the “Hello World” app. The final deliverable will look like this:
Hello World Deliverable
Your First iPhone App - Hello World
It’s very simple and shows only a “Hello World” button. When tapped, the app prompts you a message. That’s it. Nothing complex but it helps you kick off your iOS programming journey.

Start Coding!

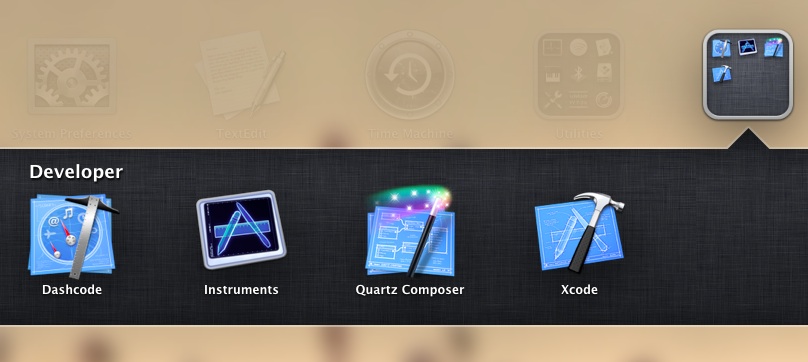
First, launch Xcode. If you’ve installed Xcode via Mac App Store, you should be able to locate Xcode in the LaunchPad. Just click on the Xcode icon to start it up.
Xcode Folder
Once launched, Xcode displays a welcome dialog. From here, choose “Create a new Xcode project” to start a new project:
Xcode - Welcome Dialog
Xcode shows you various project template for selection. For your first app, choose “Single View Application” and click “Next”.
Choose Xcode Template
Xcode Project Template Selection
This brings you to another screen to fill in all the necessary options for your project.
Xcode Project Options
Project Options for Hello World App
You can simply fill in the options as follows:
  • Product Name: HelloWorld – This is the name of your app.
  • Company Identifier: com.appcoda – It’s actually the domain name written the other way round. If you have a domain, you can use your own domain name. Otherwise, you may use mine or just fill in “edu.self”.
  • Class Prefix: HelloWorld – Xcode uses the class prefix to name the class automatically. In future, you may choose your own prefix or even leave it blank. But for this tutorial, let’s keep it simple and use “HelloWorld”.
  • Device Family: iPhone – Just use “iPhone” for this project.
  • Use Storyboards: [unchecked] – Do not select this option. You do not need Storyboards for this simple project.
  • Use Automatic Reference Counting: [checked] – By default, this should be enabled. Just leave it as it is.
  • Include Unit Tests: [unchecked] – Leave this box unchecked. For now, you do not need the unit test class.
Click “Next” to continue. Xcode then asks you where you saves the “Hello World” project. Pick any folder (e.g. Desktop) on your Mac. You may notice there is an option for Source Control. Just deselect it. We’ll discuss about this option in the later tutorials. Click “Create” to continue.
Select Xcode Project Folder
Pick a Folder to Save Your Project
As you confirm, Xcode automatically creates the “Hello World” project based on all the options you provided. The screen will look like this:
Main Xcode Window for Hello World Project

Familiarize with Xcode Workspace

Before we move on to code your app, let’s take a few minutes to have a quick look at the Xcode workspace environment. On the left pane, it’s the project navigator. You can find all your files under this area.
Xcode Project Navigator
Project Navigator in Workspace
The center part of the workspace is the editor area. You do all the editing stuffs (such as edit project setting, class file, user interface, etc) in this area depending on the type of file selected.
Xcode Editor Utility Area
Editor and Utility Area in Xcode
The rightmost pane is the utility area. This area displays the properties of the file and allows you to access Quick Help. If Xcode doesn’t show this area, you can select the rightmost view button in the toolbar to enable it.
Lastly, it’s the toolbar. It provides various functions for you to run your app, switch editor and the view of the workspace.
Xcode Toolbar
Toolbar in Workspace

Run Your App for the First Time

Even you haven’t written any code, you can run your app to try out the Simulator. This gives an idea how you build and test your app in Xcode. Simply hit the “Run” button in the toolbar.
Xcode Run Button
Run Button in Xcode
Xcode automatically builds the app and runs it in the Simulator. This is how the Simulator looks like:
Run Hello World First Time
The Simulator
A gray screen with nothing inside?! That’s normal. As your app is incomplete, the Simulator just shows a blank screen. To terminate the app, simply hit the “Stop” button in the toolbar.
Xcode Stop Button
Terminate the Running App

Back to Code

Okay, let’s move on and start to add the Hello World button to our app. Go back to the Project Navigator and select “HelloWorldViewController.xib”.
Hello World XIB File
Select HelloWorld XIB File
As you select the file, the editor changes to an Interface Builder and displays an empty view of your app like below:
Hello World Interface Builder
Interface Builder in Xcode
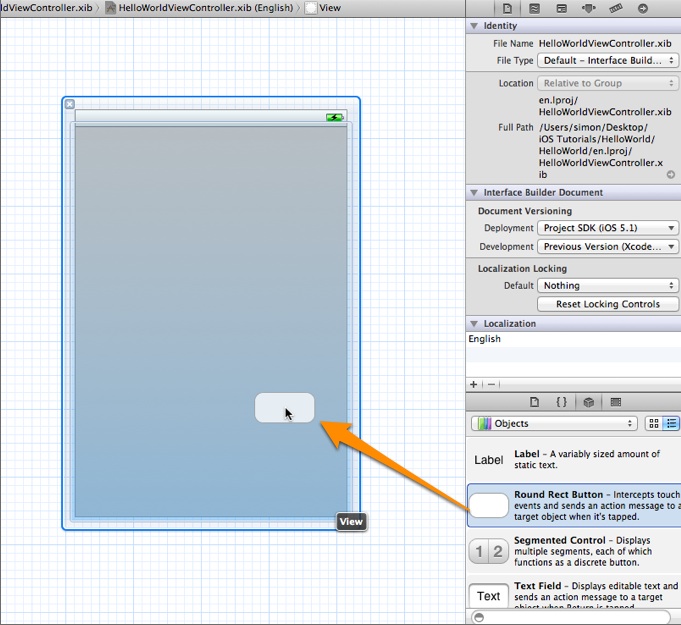
In the lower part of the utility area, it shows the Object library. From here, you can choose any of the UI Controls, drag-and-drop it into the view. For the Hello World app, let’s pick the “Round Rect Button” and drag it into the view. Try to place the button at the center of the view.
Hello World Drag Rect Button
Drag the Round Rect Button to the View
To edit the label of the button, double-click it and name it “Hello World”.
Edit Hello World Button
Try to run the app again and you should have an app like this:
Run Hello World with Button
Now Hello World with a Button
For now, if you tap the button, it does nothing. We’ll need to add the code for displaying the “Hello, World” message.

Coding the Hello World Button

In the Project Navigator, select the “HelloWorldViewController.h”. The editor area now displays the source code of the selected file. Add the following line of code before the “@end” line:
1
-(IBAction)showMessage;
Your code should look like this after editing:
HelloWorldViewController Show Message
Next, select the “HelloWordViewController.m” and insert the following code before the “@end” line:
1
2
3
4
5
6
7
8
- (IBAction)showMessage
{
    UIAlertView *helloWorldAlert = [[UIAlertView alloc]
                                    initWithTitle:@"My First App" message:@"Hello, World!" delegate:nil cancelButtonTitle:@"OK" otherButtonTitles:nil];
   
    // Display the Hello World Message
    [helloWorldAlert show];
}
After editing, your code should look like below:
Source Code of HelloWorldViewController
Source Code of HelloWorldViewController After Editing
Forget about the meaning of the above Objective-C code. I’ll explain to you in the next post. For now, just think of “showMessage” as an action and this action instructs iOS to display a “Hello World” message on screen.

Connecting Hello World Button with the Action

But here is the question:
How can the “Hello World” button know which action to invoke when someone taps on it?
Next up, you’ll need to establish a connection between the “Hello World” button and the “showMessage” action you’ve just added. Select the “HelloWorldViewController.xib” file to go back to the Interface Builder. Press and hold the Control key on your keyboard, click the “Hello World” button and drag to the “File’s Owner”. Your screen should look like this:
Hello World Button File Owner Connection
Release both buttons and a pop-up shows the “showMessage” action. Select it to make a connection between the button and “showMessage” action.
Send Event Pop-up from File's Owner

Test Your App

That’s it! You’re now ready to test your first app. Just hit the “Run” button. If everything is correct, your app should run properly in the Simulator.
Hello World App
Hello World App
Congratulation! You’ve built your first iPhone app. It’s a simple app however, I believe you already have a better idea about Xcode and how an app is developed.
In the next post, I’ll further explain the Objective-C code we’ve done here and how the HelloWorld app actually works. Stay tuned.
As always, if you come across any problem while creating your app, head over to our AppCoda Community forum and post your question.