INTRODUCING BLUEDRAGON
Enter the dragon! The BlueDragon Server, that is. BlueDragon is a CFML (ColdFusion Markup Language) web server (much like Adobe’s ColdFusion Server), created by a company called New Atlanta. Like the Adobe server, the BlueDragon development server is free. But unlike Adobe’s developer version, it doesn’t restrict IP addresses, although the free version doesn’t support SSL and cannot be used in commercial applications. If your application doesn’t need SSL and is not commercial, then BlueDragon is a terrific alternative to Adobe’s server. Another advantage is that you can actually deploy your application on your own server (as long as it’s non-commercial).

In this article, I’ll show you how to install and configure the BlueDragon web server and write a very simple ColdFusion application. These instructions are very much targeted toward developers who are experimenting with ColdFusion-style development for the first time.
First up, let’s talk about the differences in the CFML (Cold Fusion Markup Language) support provided for BlueDragon and for the official Adobe server. Some tags are unsupported (although often this is with good reason, as they’re either deprecated or obsolete), some are supported with minor differences (often in the form of options that can be passed to the tag), and some include enhancements to Adobe’s implementation. For the most up-to-date compatibility information, visit New Atlanta’s documentation page for the BlueDragon Server.
One other important point to note is that BlueDragon doesn’t currently support CFMX8. So if you’re working through a ColdFusion-based tutorial using BlueDragon, be sure to keep this point — and the tag compatibility differences mentioned above — in mind.
INSTALLING BLUEDRAGON
Now that you’re aware of the differences between BlueDragon and Adobe’s implementation of CFML, we can install the BlueDragon server and start experimenting. Visit New Atlanta’s download page for BlueDragon to download the installer. The free version that I’ll assume you’re running throughout this article is located at the very bottom of the page. While this article only covers the installation of the Windows version, installers are available for Mac and Linux as well. Installation instructions for other platforms are available on the documentation page.
The install process is straightforward — you’ll be asked to agree to the software license and decide where you want the server to be installed. One screen will ask you for the port number that you wish to run the web server on. The default port is 8080, but you can choose another port if necessary (other development environments, like Ruby On Rails, also use this port for their internal web servers). You also have the option to integrate your BlueDragon server with another web server, as shown in Figure 1.
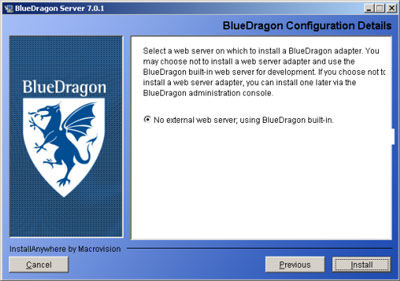
If you’re just getting started with ColdFusion-style development, it’s a good idea to stick with the built-in BlueDragon server, rather than using Apache or IIS, in case you hit any compatibility hurdles.
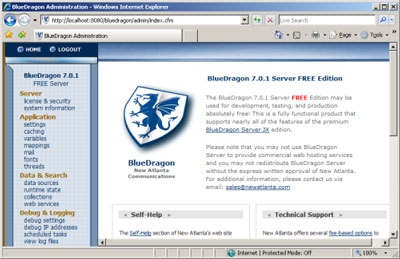
Another installation step will ask you for your password; since the free BlueDragon Server doesn’t support SSL, it’s a good idea to choose a password that you haven’t used on other systems (consider using a site likehttps://www.goodpassword.com to create a random string). Once the installation is complete, the BlueDragon admin console will launch in your web browser. You should see a login form, shown in Figure 2, at which point you can enter the admin password that you specified during the installation process.

Once you’ve logged in, you’ll see the main console page, shown in Figure 3. The ins and outs of this console are beyond the scope of this article, but suffice it to say that this is where all of the main settings for the BlueDragon web server are contained.
Now that our server is set up, it’s time to write some code to see how well it operates.
CHECKING THE WEB SERVER
To verify that pages other than the admin console are being rendered correctly, open a new tab in your web browser and type the following URL into your address bar:
http://localhost:8080/. If you changed the default port from 8080, use your custom port number instead. The list of variables shown in Figure 4 should display.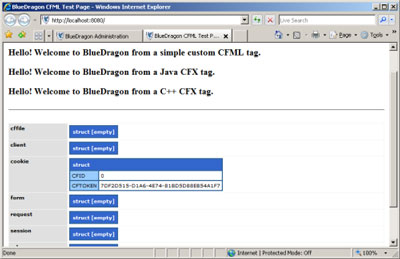
If you have some experience with web servers, you’re probably wondering where the index file that’s responsible for this page is stored. The document root of the BlueDragon server can be found in the directory in which BlueDragon was installed, under the folder
wwwroot. For a default installation on Windows, the document root is the folder C:\BlueDragon_Server_70\wwwroot. In this directory you’ll find a file calledindex.cfm. This is the file that was parsed by the BlueDragon server in order to produce the page in Figure 4.
If you open this file in a text editor, you’ll see a bunch of HTML as well as a number of tags beginning with
cf. This is CFML — the core language of ColdFusion. If you haven’t dealt with ColdFusion development before, this code may not make much sense to you, but fear not — we’ll walk through it now.
Before we analyze this code, or write any code of our own, let’s get set up with a decent code editing tool.
COLDFUSION DEVELOPMENT WITH CFECLIPSE
Another potential cost when developing with ColdFusion is that of an IDE (Integrated Development Environment). Of course, Adobe sells the Dreamweaver MX product for development, and HomeSite+ also can be used for ColdFusion development. But these products cost money, and we’re trying to avoid that! Fortunately, we can use a free add-on to the Eclipse IDE (Integrated Development Environment) calledCFEclipse.
This add-on is installed through the Eclipse update manager, so first you’ll need to install Eclipse.
Once you’ve done so, fire it up, and select Help > Software Updates > Find and Install. When you’re prompted, click on the Select new features to install option, which will bring up a list of locations to choose from. The CFEclipse plugin isn’t listed, so we’ll need to add it — click on New Remote Site…, and enter
"CFEclipse" in the name field, and http://www.cfeclipse.org/update as the URL. Once you’ve done that, make sure that only the CFEclipse option is checked, then click Continue. Continue through with the rest of the installation process, restarting Eclipse when you’re done.
What if Eclipse doesn’t behave?
If Eclipse doesn’t start after you’ve installed the plugin, try running it from the command line as eclipse
If Eclipse doesn’t start after you’ve installed the plugin, try running it from the command line as eclipse
-clean.
Now that CFEclipse is installed, it’s time to create a new CFML project. Select
File > New Project to bring up the new project wizard. As I’ve done in Figure 5 below, select CFML Project from the CFEclipse category.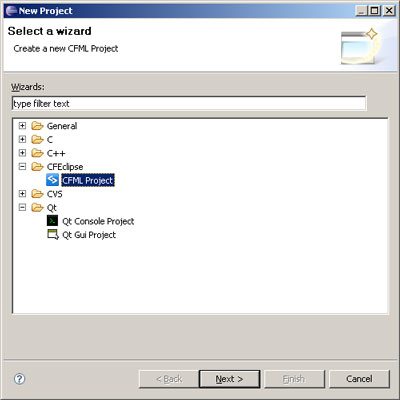
The next screen will prompt you for a project name — we’ll call our first project MyFirstColdfusion. DeselectUse default location from the Directory option and browse for the
wwwroot directory that we created during the BlueDragon installation.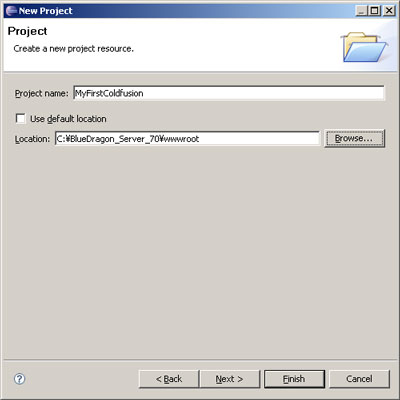
The project creation wizard will prompt you for "referenced projects," a setting you can safely ignore for now. You may also be prompted to switch perspectives. A perspective is a version of the Eclipse user interface that can be modified, depending on which programming language you’re coding in, and what stage of the development process you’re at. Go ahead and allow Eclipse to change your current perspective.
When you’ve successfully created your project, look for the MyFirstColdfusion folder under the Project Navigator, click the
+ next to the folder to expand the view, and locate the index.cfm file. Double-click the filename to edit it in Eclipse."HELLO WORLD!" COLDFUSION-STYLE
By default, our
index.cfm file contains a number of confusing tags; let’s delete the entire contents of this file and replace it with the following code:<html>
<head>
<title>BlueDragon CFML Test Page</title>
</head>
<body bgcolor=#FFFFFF>
<h1>BlueDragon CFML Test Page</H1>
<!-- Our code will go here -->
</body>
</html>
Note that I’ve left a comment in the body of our HTML file that indicates where we’ll add our ColdFusion code later. Most introductions to programming languages begin with a simple "Hello world!" example, however, because we could easily achieve this goal using a simple HTML tag, we’ll instead create an example that’s a little more dynamic and CFML-specific. Here’s our sample code:
<cfset hello_world = "Hello World!">

<cfoutput>#hello_world#</cfoutput>
Point your web browser at
http://localhost:8080/, and you should see a page that displays "BlueDragon CFML Test Page" in its title, and the words "Hello World!" in its body.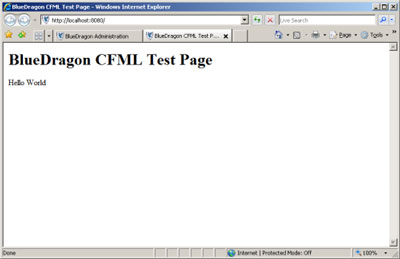
Congratulations — you’ve just written your first CFML program! Now, you may be wondering, "What did I just do?" Let’s examine that first line of code:
<cfset hello_world = "Hello World!">
The
cfset tag is used to set variables. In this case, we’re creating a string that contains the value "Hello World," and can be identified by the name hello_world. In its most basic form, cfset syntax looks something like this:<cfset variable_name = value>
While we’ve used a string in the above example, we could just as well have assigned a different data type, such as a number, an array or a list.
Let’s take another look at that second line of code:
<cfoutput>#hello_world#</cfoutput>
The
cfoutput tag accomplishes the same goal as functions such as print and echo in other languages — it writes output to the browser (which is why it’s called, erm, cfoutput). The # signs inside the tag let cfoutput know that the contents it contains are dynamic. You can place either a variable or the result of a function inside the # signs, and it will be evaluated and replaced with the dynamic content. You can also mix regular text with dynamic content, like this:<cfoutput>The variable hello_world = #hello_world#</cfoutput>
This would produce the following output:
The variable hello_world = Hello World!CONCLUSION
In this article, I introduced you to the free BlueDragon CFML server and the CFEclipse plugin. We walked through the installation process for both of these tools, and then you used them to write and execute your first CFML script. If the fear of cost and remote IP restrictions was preventing you from diving into ColdFusion development, you now have no more excuses. You can get started with these free tools today!
No comments:
Post a Comment